TABLE OF CONTENTS
Overview
NXLog (Network Extended Log) processes Windows Event Logs and forwards them to the OTM (Operational Threat Management) CCE (Collection and Control Engine). NXLog uses Apache-style configuration files with blocks and directives similar to XML (eXtensible Markup Language) tags for structured log processing and forwarding.
Reference: Configuration overview | NXLog Docs
Prerequisites
Step 1: Log in to the collector/AD (Active Directory) computer as Administrator.
Step 2: Download NXLog Community Edition.
Use the Windows MSI (Microsoft Software Installer) file with the installer.
Download from: Download - NXLog Community Edition
Direct download: NXLog Community Edition 2.11.2190
Steps of Configuration
Step 1: Configure the NXLog Configuration File
Step 1: Open the NXLog configuration file at:C:\Program Files\nxlog\conf\nxlog.conf (follow the exact path).
Step 2: Run Notepad or Notepad++ with administrative rights.
Step 3: Open the nxlog.conf file.
Step 4: Replace the entire configuration with the following content:
Note: Replace CCE_IP_ADDRESS with the actual ADR Server IP (Internet Protocol) address.
## This is a sample configuration file. See the nxlog reference manual about the
## configuration options. It should be installed locally and is also available
## online at http://nxlog.org/docs/
## Please set the ROOT to the folder your nxlog was installed into,
## otherwise it will not start.

define ROOT C:\Program Files\nxlog
#define ROOT C:\Program Files (x86)\nxlog
#define ROOT C:\Program Files (x86)\nxlog

Moduledir %ROOT%\modules
CacheDir %ROOT%\data
Pidfile %ROOT%\data\nxlog.pid
SpoolDir %ROOT%\data
LogFile %ROOT%\data\nxlog.log

<Extension _json>
  Module xm_json
</Extension>
define aisiem \
1, 2, 3, 4, 5, 6, 7, 8, 9, 10, 11, 12, 13, 14, 15, 17, 18,19, 20, 21, 104, 257, 258, 259, 261, 260,\
261, 262, 500, 517, 520, 528, 529, 530, 531, 532, 533, 534, 535, 536, 537, 538, 539,\
540, 551, 552, 565, 592, 600, 601, 602, 608, 609, 621, 622, 626, 627, 628, 629, 630, 636, 642, 644,\
645, 647, 632, 663, 664, 671, 673, 675, 676, 677, 679, 680, 681, 682, 683, 684, 689,\
690, 692, 1001, 1006, 1007, 1008, 1015, 1074, 1102, 1116, 1117, 1118, 1119, 1125, 2003, 2100, \
4608, 4609, 4616, 4624, 4625, 4634, 4647, 4648, 4649, 4656, 4657, 4659, 4460, 4661, 4662, 4663, 4670, 4672, 4685, 4688, 4690, 4698, 4697, \
4702, 4703, 4704, 4705, 4717, 4718, 4719, 4720, 4722, 4723, 4724, 4725, 4726, 4727, 4728, 4729, 4730, \
4731, 4732, 4733, 4734, 4735, 4737, 4738, 4739, 4740, 4741, 4742, 4743, 4744, 4745, \
4746, 4747, 4748, 4749, 4750, 4751, 4752, 4753, 4754, 4755, 4756, 4757, 4758, 4759, \
4760, 4761, 4762, 4763, 4764, 4765, 4767, 4769, 4771, 4772, 4773, 4775, 4776, 4777, 4778, \
4779, 4780, 4781, 4782, 4783, 4784, 4785, 4786, 4787, 4788, 4789, 4790, 4791, 4793, 4794, \
4797, 4798, 4799, 4800, 4801, 4802, 4803, 4946, 4947, 4950, 4954, 4964, 4985, 5001, 5004, 5007, 5010, 5012, 5025, 5031, 5136, 5137, 5140, \
5141, 5142, 5143, 5144, 5145, 5152, 5153, 5155, 5157, 5376, 5377, 5447, 6005, 6006, 6008, 7034, 7035, 7036, 7040, 7045, 8003, 8004, 8007, 64004

<Input in>
      Module im_msvistalog
      Query <QueryList>\
                  <Query Id="0">\
                        <Select Path="Security">* </Select>\
                        <Select Path="Application">* </Select>\
                        <Select Path="Setup">* </Select>\
                        <Select Path="System">* </Select>\
                  </Query>\
            </QueryList>
            <Exec>
                  if ($EventID NOT IN (%aisiem%)) drop();
            </Exec>
</Input>

<Output out>
  Module om_udp
  Host CCE_IP_ADDRESS
  Port 5154
  Exec to_json();
</Output>

<Route 1>
  Path in => out
</Route>
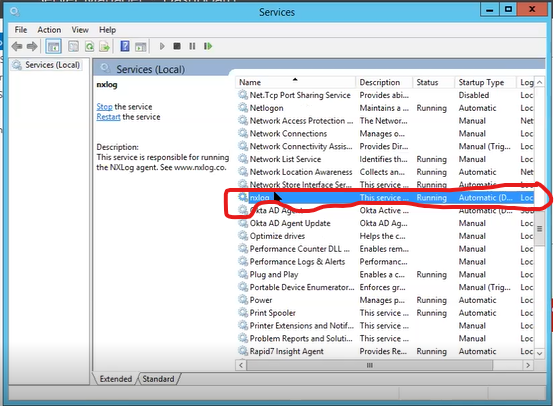
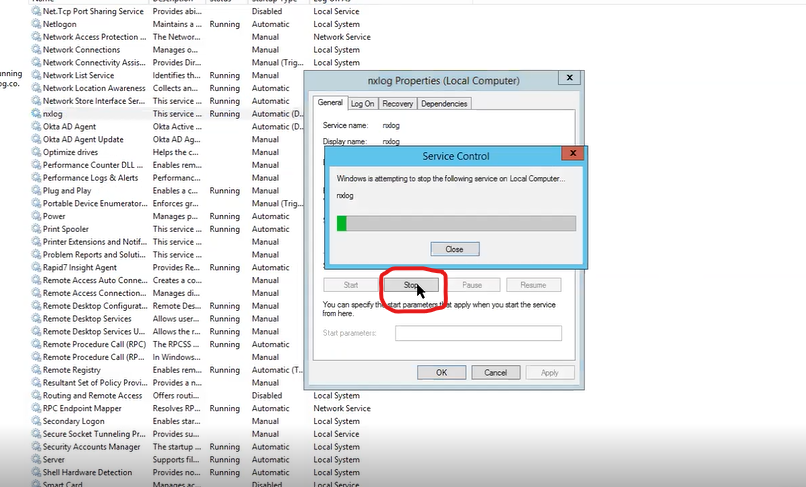
Open Services (from the Windows search box) and restart nxlog from the list of services. If you do not find this service, type the following commands at an elevated (administrator) command prompt:
net stop nxlog
net start nxlog
Click on: NXLog
Click on: Stop
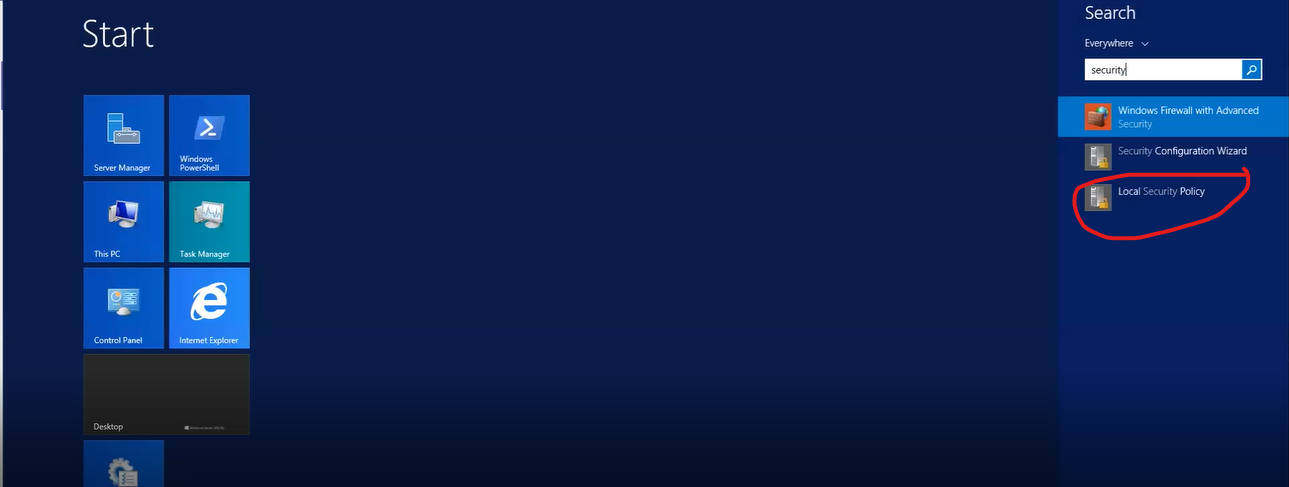
Search for: Local Policies in the search box again.
Click on: Local Policies
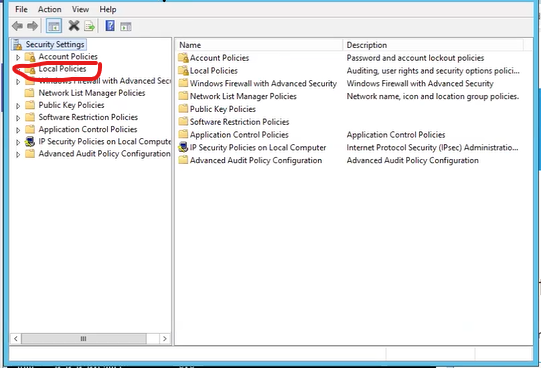
Click on: Audit Policy
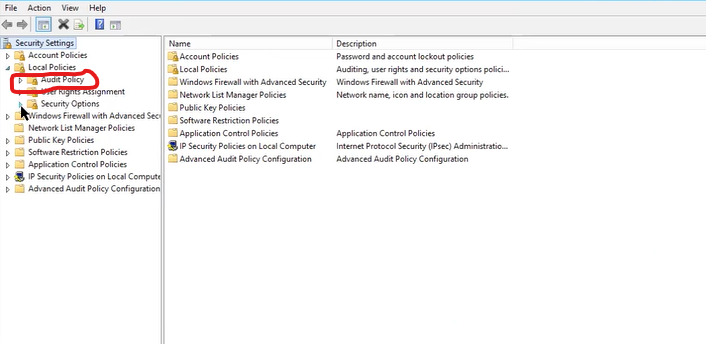
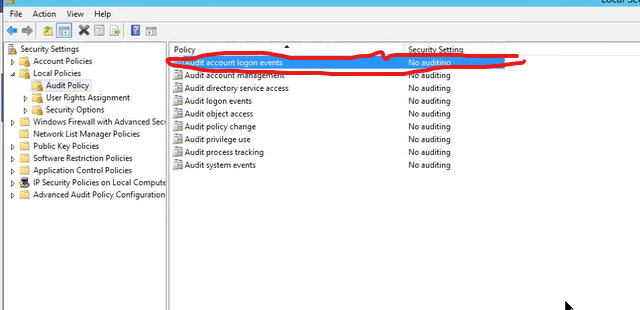
Select the Success and Failure checkboxes >> Apply >> OK.
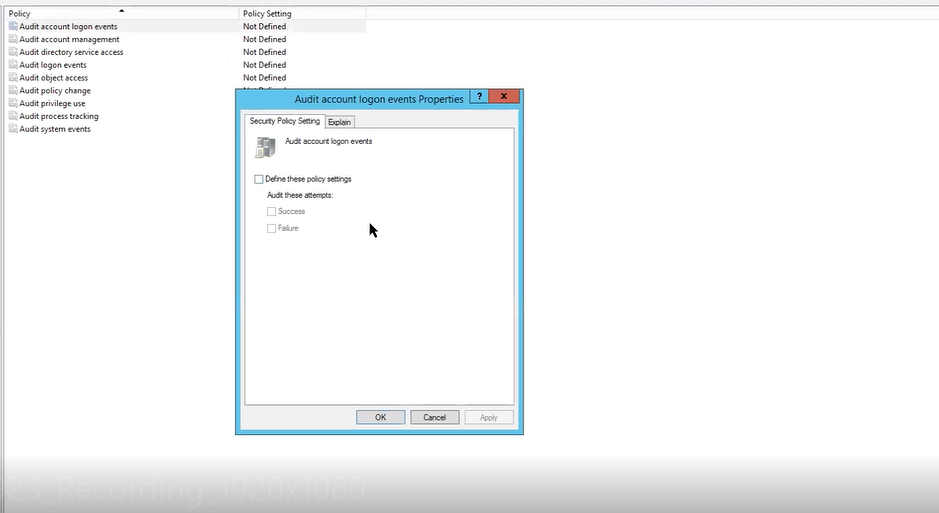
Repeat this for all policies one by one.
Once the policies are enabled, open Command Prompt and run the command
gpupdate /forceto validate that the policies are enabled.


Verification (MSSP Only)
Configuration success can be validated through the UI (User Interface) or the CCE server.
Verification through UI
1. Open UI >> Systems
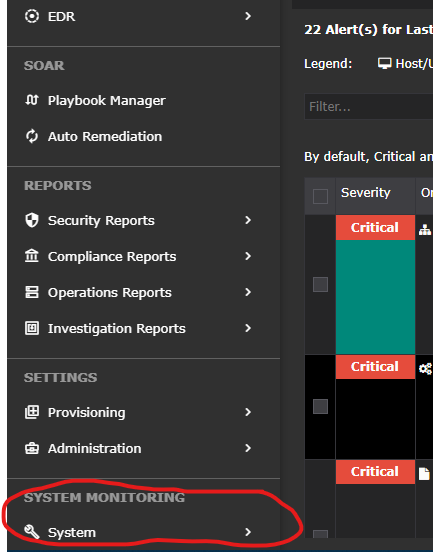
2. Expand Systems and go to Logs and Flows Collection Status.
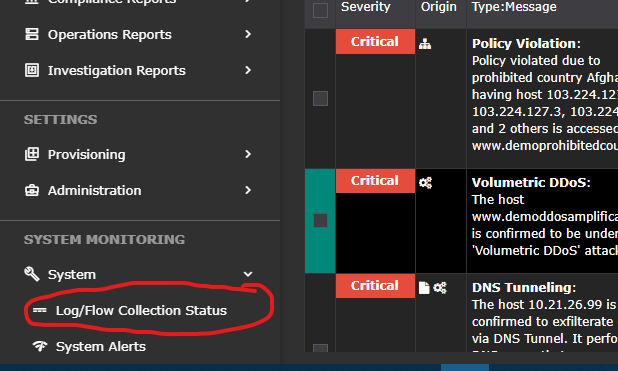
Under the Source Device IP Address section, the configured device will be listed.
Verification through CCE server
sudo tcpdump -i any port 5154 and host <Windows_Server_IP> -AAAWas this article helpful?
That’s Great!
Thank you for your feedback
Sorry! We couldn't be helpful
Thank you for your feedback
Feedback sent
We appreciate your effort and will try to fix the article