TABLE OF CONTENTS
Overview
MikroTik RouterOS by default saves logs to its own disk or memory. But RouterOS usually has limited capacity. So, creating a Syslog server and sending and saving the firewall log to that Syslog server is always better. The following steps will show how to configure MikroTik logging to send firewall logs to the remote
Syslog server.
Syslog Configuration
- Go to System > Logging menu item, click on the Action tab, and then click on PLUS SIGN (+). A New Log Action window will appear.
- Put a meaningful name (such as RemoteLog) in the Name input field.
- Choose the remote option from the Type dropdown menu.
- Now put Syslog Server’s IP address (for this article: 172.22.220.2) where MT Syslog Daemon will be run in the Remote Address input field.
- The Default Syslog port is 514 which will be set by default in the Remote Port input field. So, no need to do anything here.
- Click Apply and OK buttons.
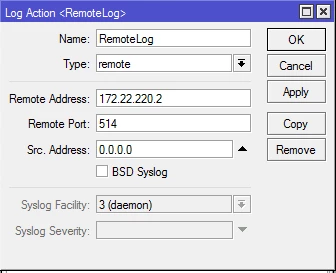
Remote Logging Setup
- Now click on the Rules tab and then click on PLUS SIGN (+). A New Log Rule window will appear.
- Choose firewall from the Topics dropdown menu.
- In the prefix field, add - MikroTik
- Choose your created action (RemoteLog) from the Action dropdown menu.
- Click Apply and OK buttons.
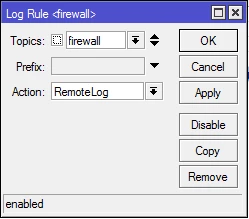
Remote Logging Rule
MikroTik will now send all firewall logs to the given IP address. To view and save these logs, we have to install and configure any Syslog application (such as Visual Syslog Server, Dude, or MikroTik Syslog Daemon) which you prefer. For this article, we will use MT Syslog Daemon to view and save MikroTik Firewall Log.
Netflow Configuration
1.Enable Traffic-Flow on the router as
[admin@MikroTik] ip traffic-flow> set enabled=yes
[admin@MikroTik] ip traffic-flow> print
                enabled: yes
             interfaces: all
          cache-entries: 1k
    active-flow-timeout: 30m
  inactive-flow-timeout: 15s
[admin@MikroTik] ip traffic-flow>
2. Specify IP address and port of the host, which will receive Traffic-Flow packets
[admin@MikroTik] ip traffic-flow target> add dst-address=<CCE IP> port=9995 version=9
[admin@MikroTik] ip traffic-flow target> print
Flags: X - disabled
 #   SRC-ADDRESS       DST-ADDRESS        PORT     VERSION
 0   0.0.0.0           192.168.0.2        2055     9
[admin@MikroTik] ip traffic-flow target>
Now the router starts to send packets with Traffic-Flow information.
Verification (MSSP Only)
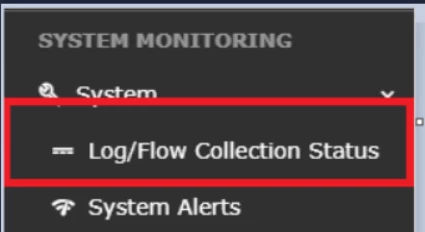
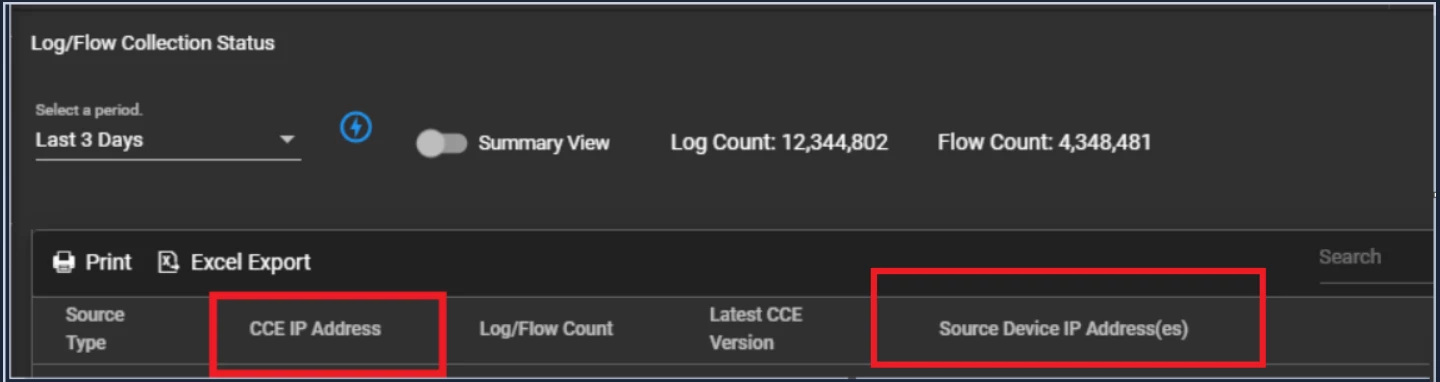
Log in to UI >> SYSTEM >> LOGS AND FLOWS COLLECTION STATUS.
Inside SOURCE DEVICE IP, MikroTik will be reflected.
Done!
Refer Link: https://wiki.mikrotik.com/wiki/Manual:IP/Traffic_Flow
Was this article helpful?
That’s Great!
Thank you for your feedback
Sorry! We couldn't be helpful
Thank you for your feedback
Feedback sent
We appreciate your effort and will try to fix the article