TABLE OF CONTENTS
- Overview
- Configuring to Send Syslog Messages
- To enable logging for Security policy
- Configuring Syslog on Juniper IDP (IDP 50 Series)
- Sending Syslog Directly from IDP Sensor
- Sending Syslog via NSM (Network and Security Manager)
- Verification (MSSP Only)
Overview
This article provides detailed steps to configure Juniper SRX Firewalls and IDP devices to send syslog messages to ADR SIEM, enabling comprehensive visibility and proactive threat detection in your environment.
Configuring to Send Syslog Messages
Option 1- Using J-Web
- Log in to the Juniper SRX device.
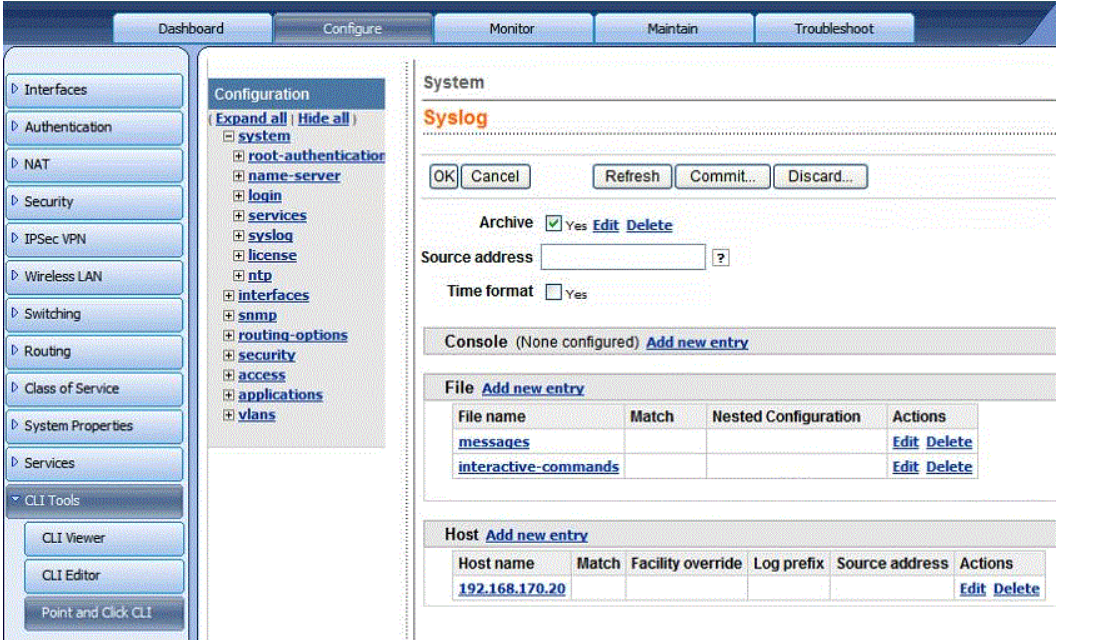
- Click Configure > CLI Tools > Point and Click CLI in the Juniper SRX device.
- Expand System and click Syslog.
- In the Syslog page, click Add New Entry placed next to 'Host'.
- Enter the IP address of the remote Syslog server (CCE server IP) (i.e., Firewall Analyzer).
- Click Apply to save the configuration.
Option 2- In case Using CLI
- Log in to the Juniper SRX device CLI console.
- Execute the following command:
user@host# set system syslog host <IP address of the remote Syslog server (i.e., Firewall Analyzer)> any anyTo enable logging for Security policy
1- Using J-Web
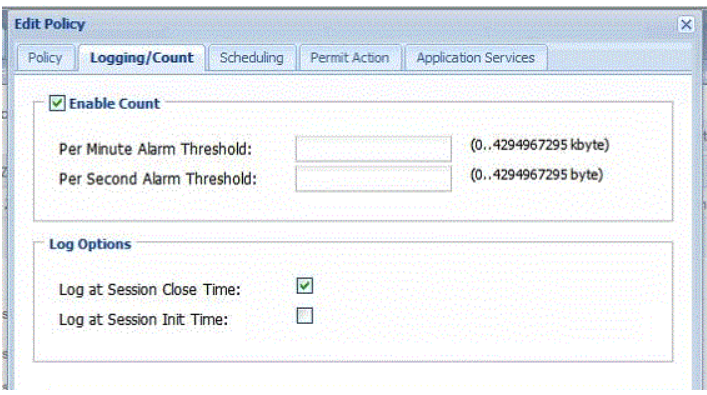
- Select Configure > Security > Policy > FW Policies.
- Click on the policy for which you would like to enable logging.
- Navigate to Logging/Count and in Log Options, select Log at Session Close Time.
2- Using CLI
- Log in to the Juniper SRX device CLI console.
- Execute the following command:
user@host# set security policies from-zone trust to-zone untrust policy permit-all then log session-closeConfiguring Syslog on Juniper IDP (IDP 50 Series)
Sending Syslog Directly from IDP Sensor
- Log in to the Juniper Networks IDP device.
- Click Device > Report Settings > Enable Syslog in the Juniper Networks IDP device.
- Select the Enable Syslog Messages check box.
- Click Apply to save the changes.
Logs generated with this configuration:
- All attacks
- Policy load
- Restart
Logs not generated with this configuration:
- Profiler logs
- Device connect/disconnect logs
- Interface UP/DOWN logs
- Logs for Bypass State Changes
Sending Syslog via NSM (Network and Security Manager)
- Log in to NSM.
- Click Action Manager > Action Parameters > Define a Syslog Server in the NSM.
- Click Action Manager > Device Log Action Criteria > Category in the NSM.
- Select Category = all and Actions = syslog enable
- Click Apply to save the changes.
Logs generated with this configuration:
- All attacks
- Policy load
- Restart
- Profiler logs
- Device connect/disconnect logs
Logs not generated with this configuration:
- Interface UP/DOWN logs
- Logs for Bypass State Changes
Verification (MSSP Only)
1. Verify Syslog Logs
Run the following on the CCE server:
sudo tcpdump -i any port 514 and host <Juniper_Firewall_IP> -AAAThis checks whether syslog packets are arriving from the Juniper firewall.
2. Verify NetFlow (sFlow/NetStream) Flows
If you’ve enabled flow export (commonly UDP 6343 for sFlow or 9995 for NetFlow/IPFIX):
sudo tcpdump -i any port 9995 and host <Juniper_Firewall_IP> -AAAThis confirms flow packets are being exported from the firewall and reaching the CCE.
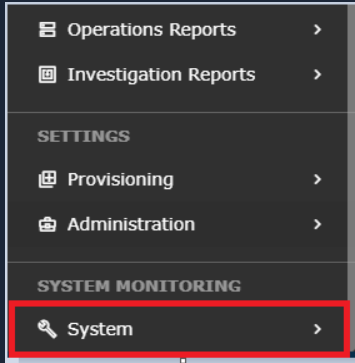
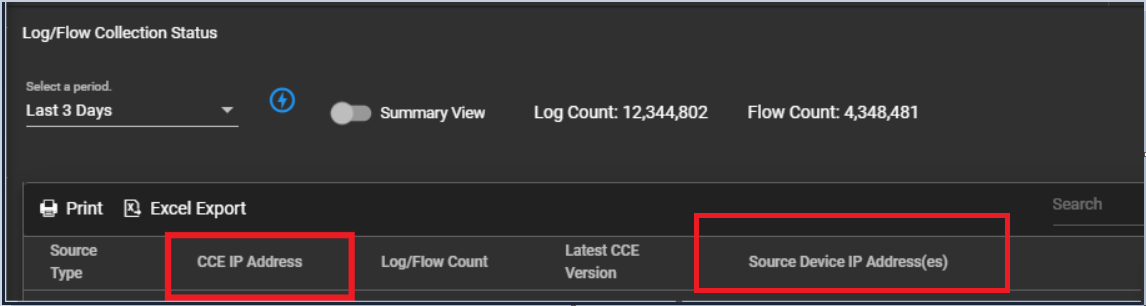
STEP 1: Login to UI >> SYSTEM >> LOGS AND FLOWS COLLECTION STATUS.
STEP 2: >> LOGS AND FLOWS COLLECTION STATUS.
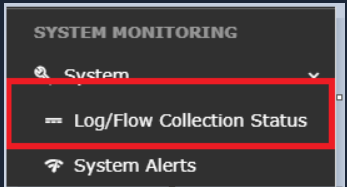
STEP 3: >> Inside SOURCE DEVICE IP, IP will reflect.
Was this article helpful?
That’s Great!
Thank you for your feedback
Sorry! We couldn't be helpful
Thank you for your feedback
Feedback sent
We appreciate your effort and will try to fix the article