The ARIA™ Cybersecurity Solutions Advanced Detection and Remediation (ADR) platform integrates with Microsoft® Azure®. When configured, Microsoft logs, including email information, are sent to the Control and Collections Engine (CCE). You can then configure the CCE to generate alerts when suspected activity occurs. This document provides the steps required to configure Microsoft Azure and the CCE.
NOTE: Before beginning, opening a text editor, such as Notepad, is recommended. Several steps require you to copy information for later use.
1 Microsoft Azure
To configure Microsoft Azure:
1. Log into the Microsoft Azure portal (portal.azure.com).
Figure 1: Azure Login
2. Click the menu icon (![]() ) and select Azure Active Directory.
) and select Azure Active Directory.

Figure 2: Select Azure Active Directory
3. Copy the Primary domain value to a text editor. This information is required for a later step.

Figure 3: Copy Primary Domain
4. Click Users.
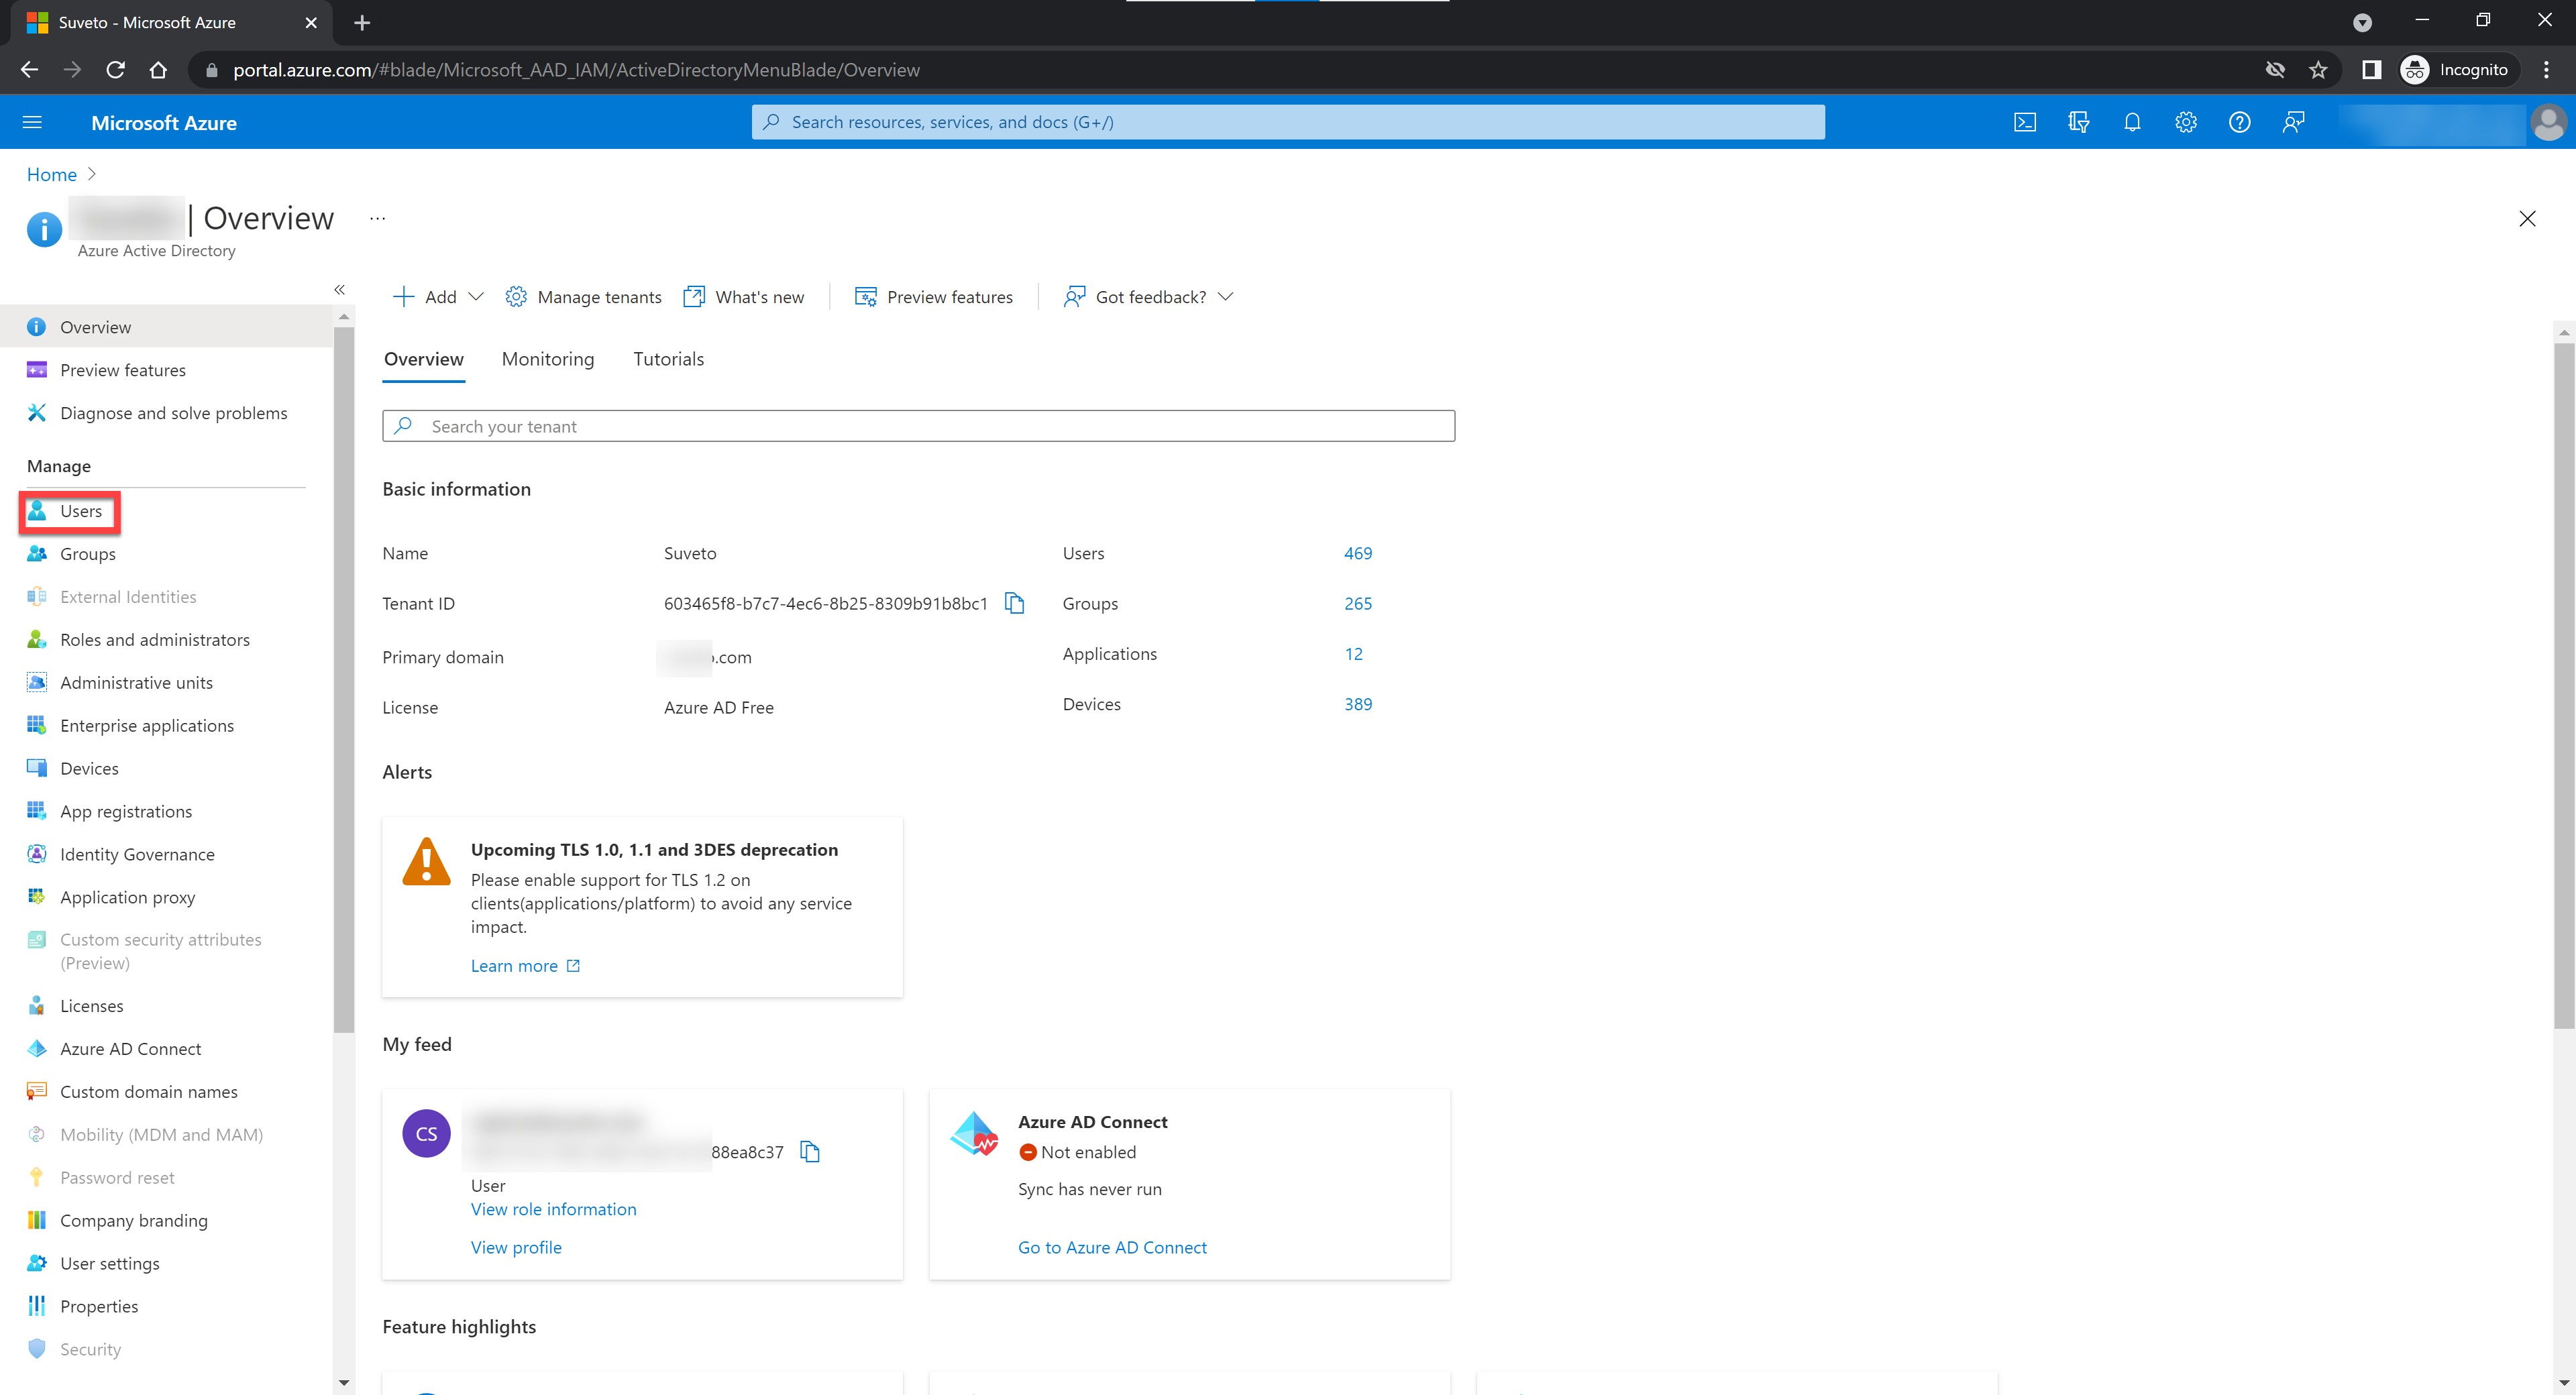
Figure 4: Click Users
5. Search for the Admin email address and copy the domain to a text editor.
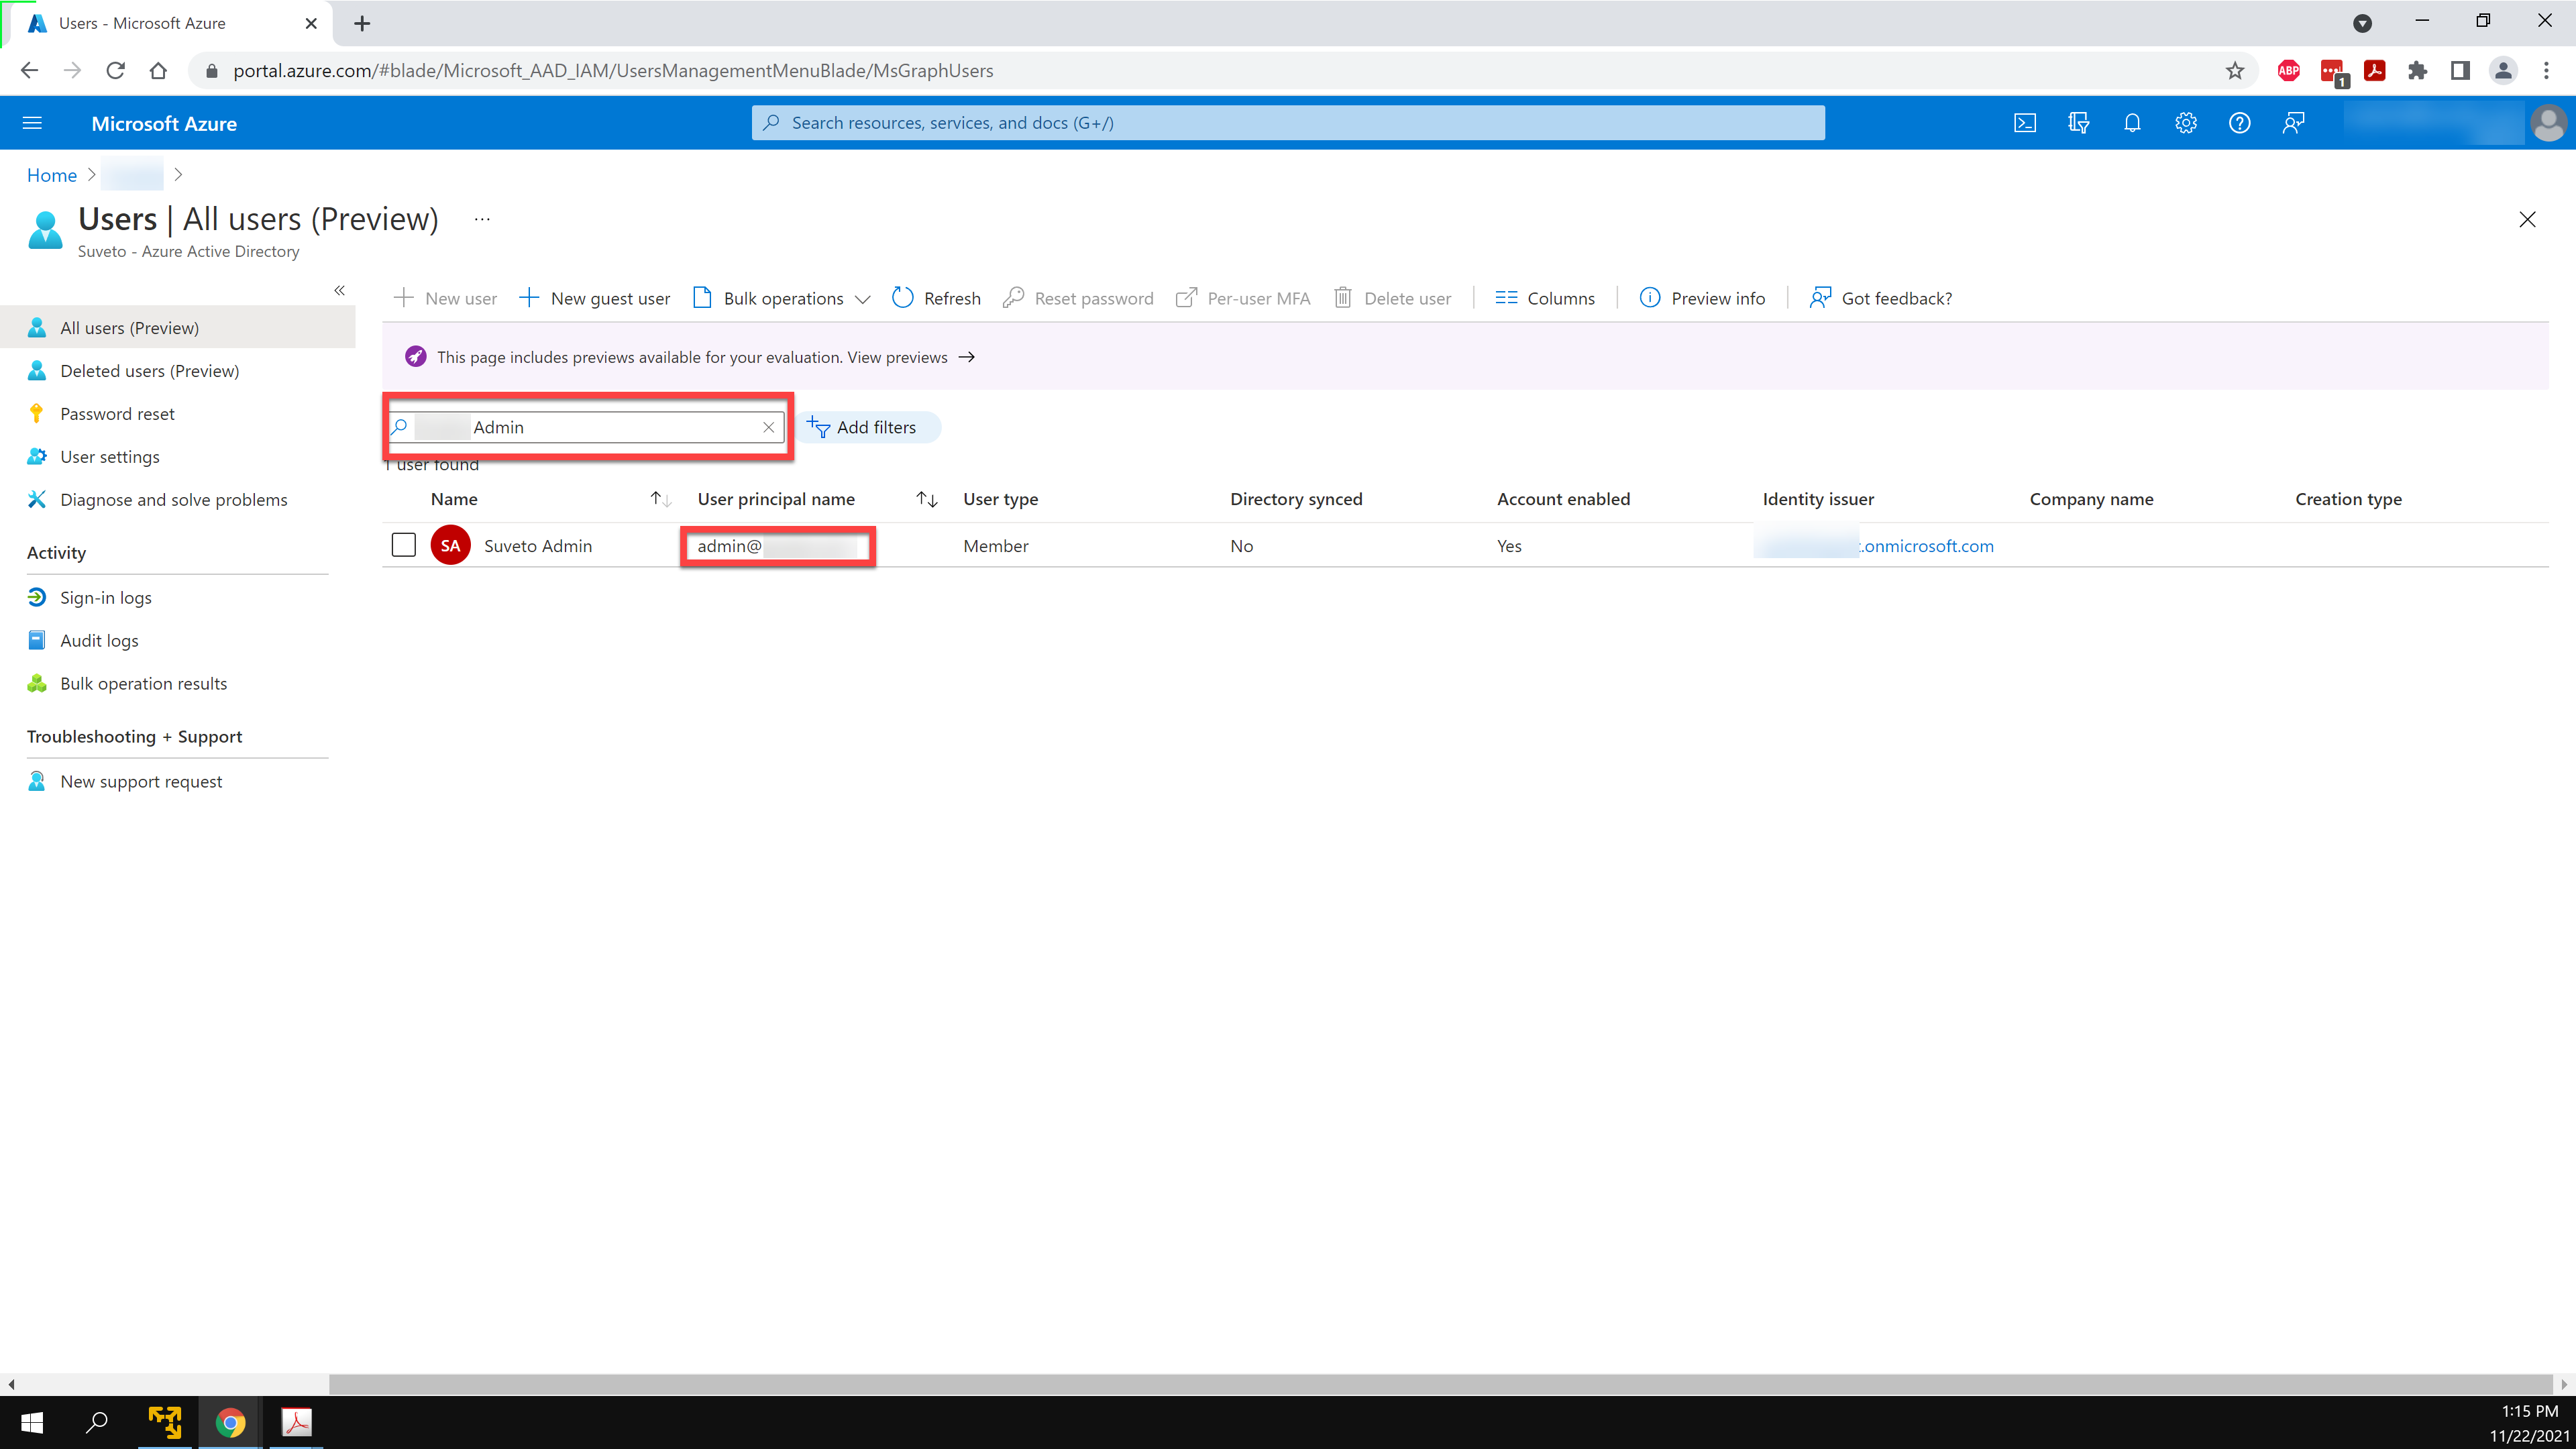
Figure 5: Copy Domain from Email Address
6. Click App registrations then New registration to add a new application.

Figure 6: New Registration
7. Complete the following fields and click Register in the Register an application page:
l Name: Enter a name for the application.
l Supported account type: Select Accounts in this organizational directory only.
l Redirect URI: Select Web and enter the primary domain.

Figure 7: Register Application
8. Copy the client and tenant IDs to a text editor and click the Redirect URIs link.

Figure 8: Copy IDs
9. Make sure ID tokens is checked and click Save.
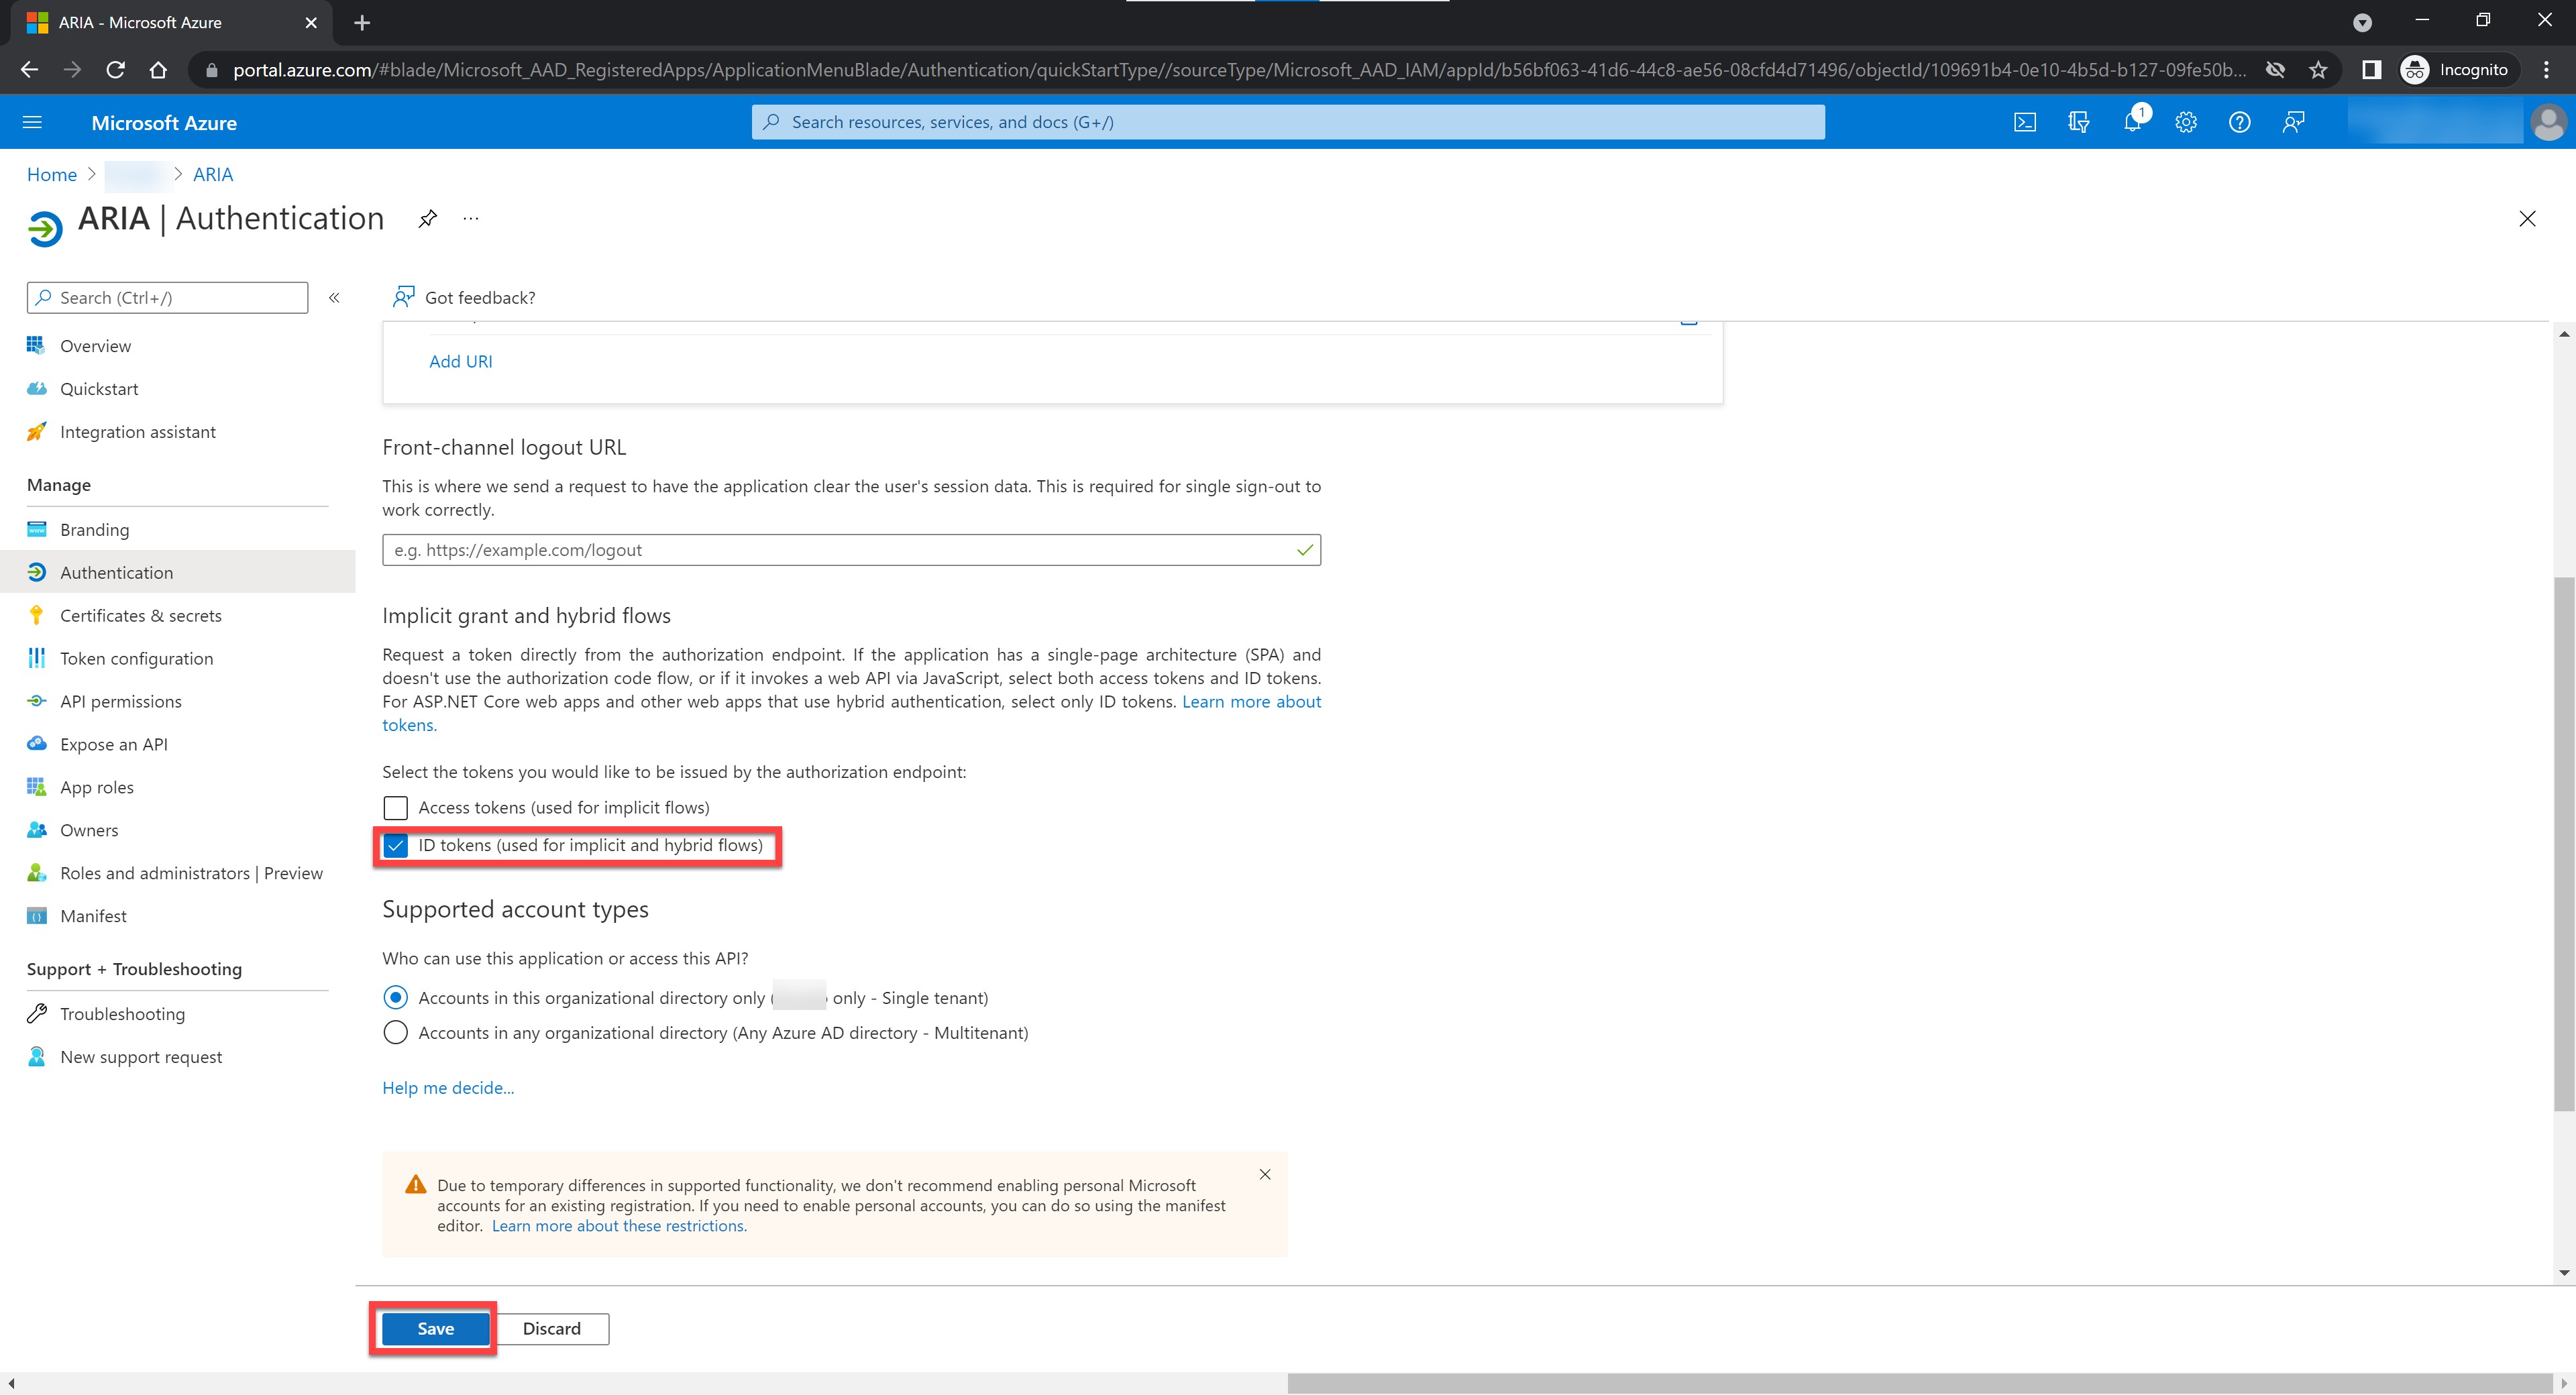
Figure 9: Select ID Tokens
10. Select Certificates & secrets.
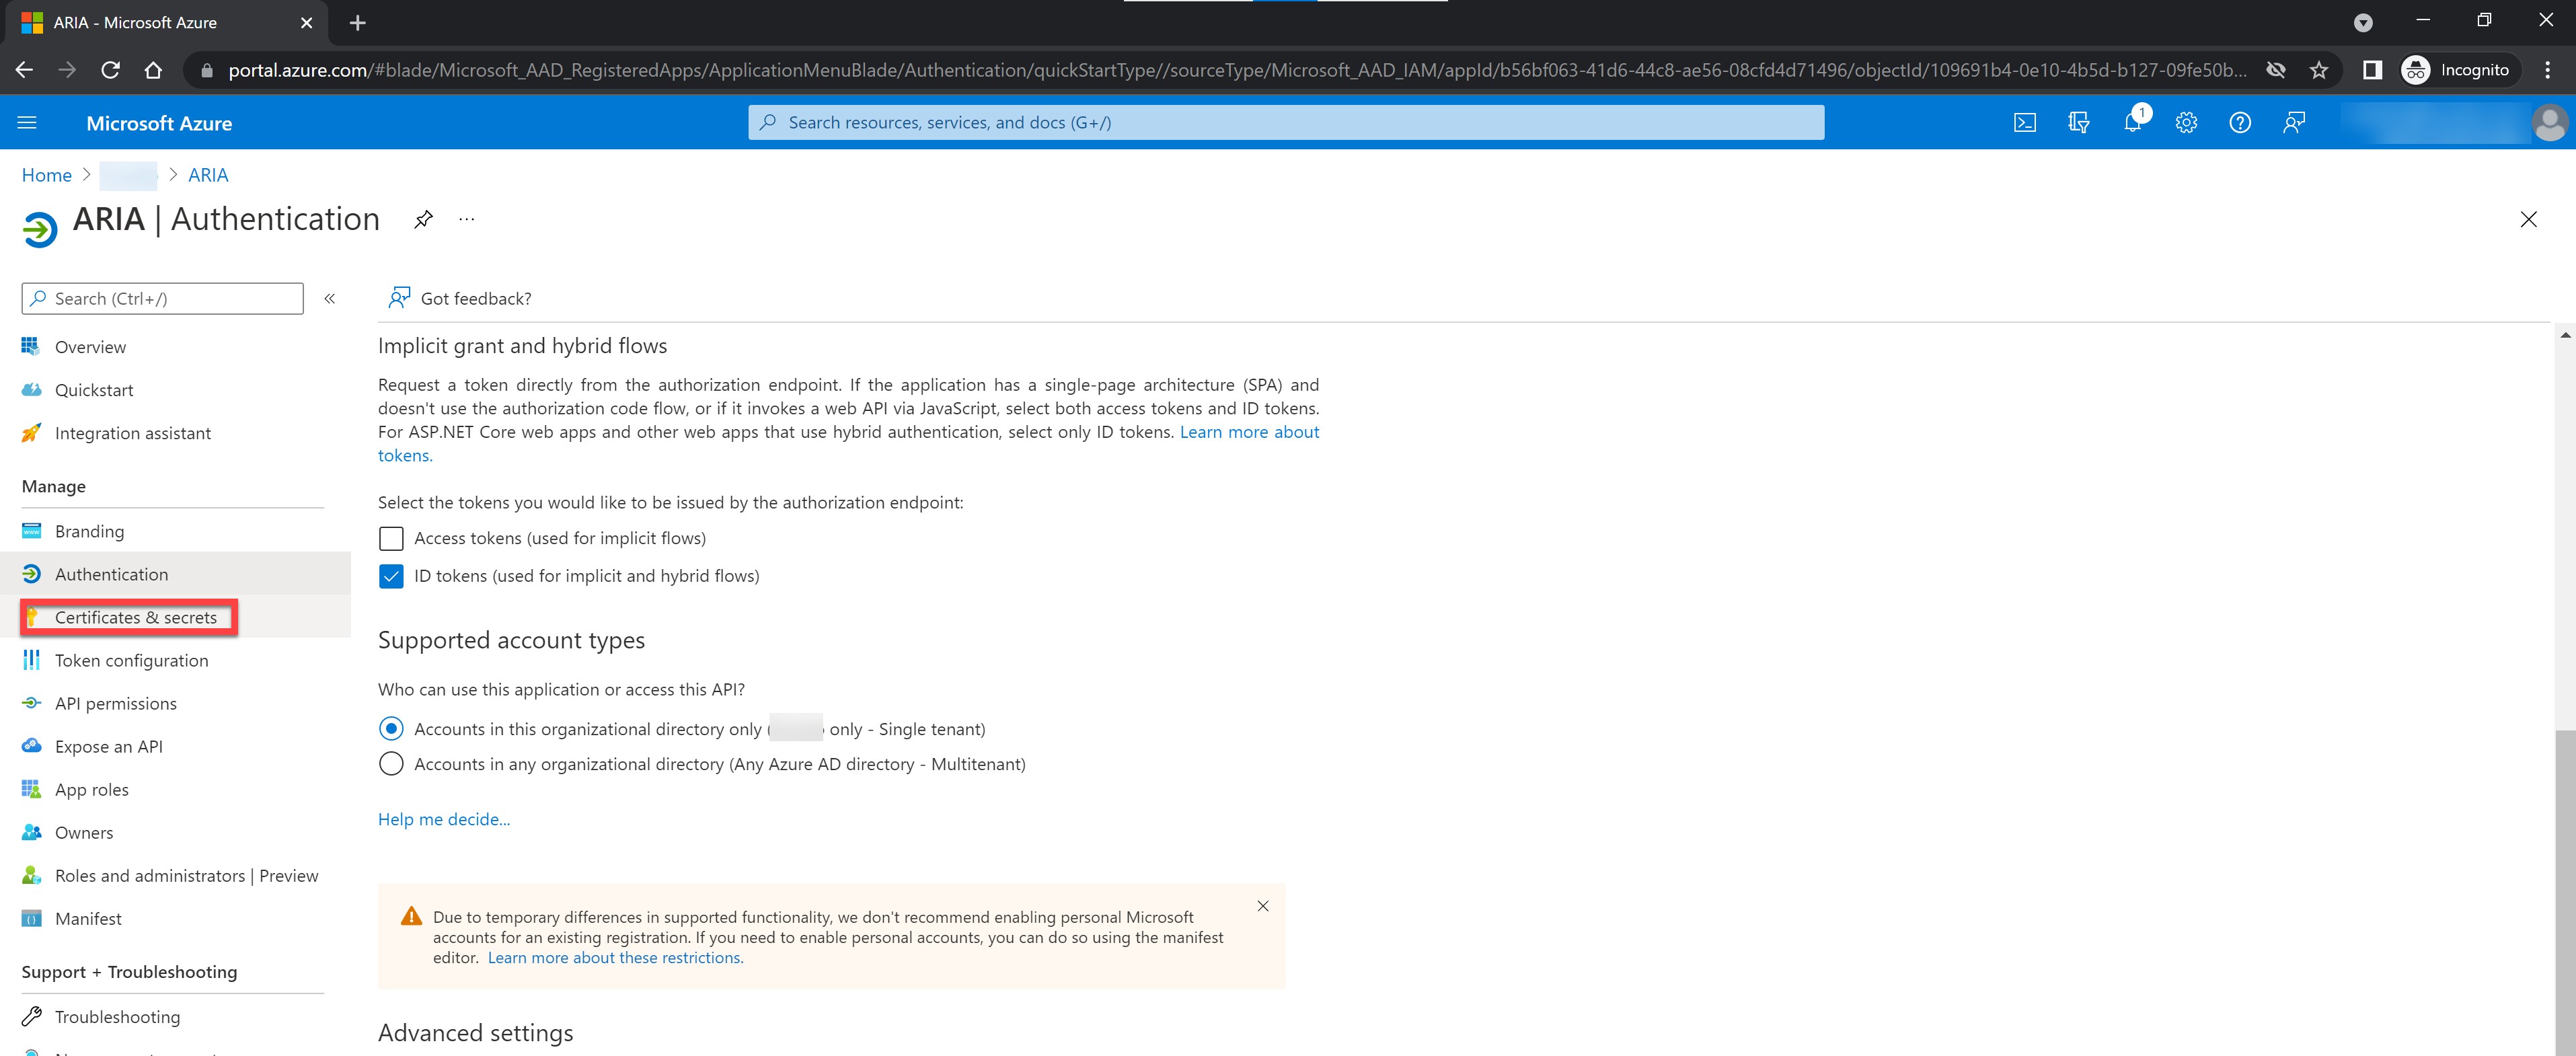
Figure 10: Select Certificates & Secrets
11. Click New client secret to add a new secret.

Figure 11: Add New Secret
12. Enter a description and use the drop-down box to select the number of months the secret is valid.

Figure 12: Enter Secret Description and Expiration Time
13. Use the copy button (![]() ) to copy the client secret Value and save it in a text editor.
) to copy the client secret Value and save it in a text editor.
NOTE: This value will no longer be available once you navigate away from the page.

Figure 13: Copy Secret Value
14. Select API permissions.
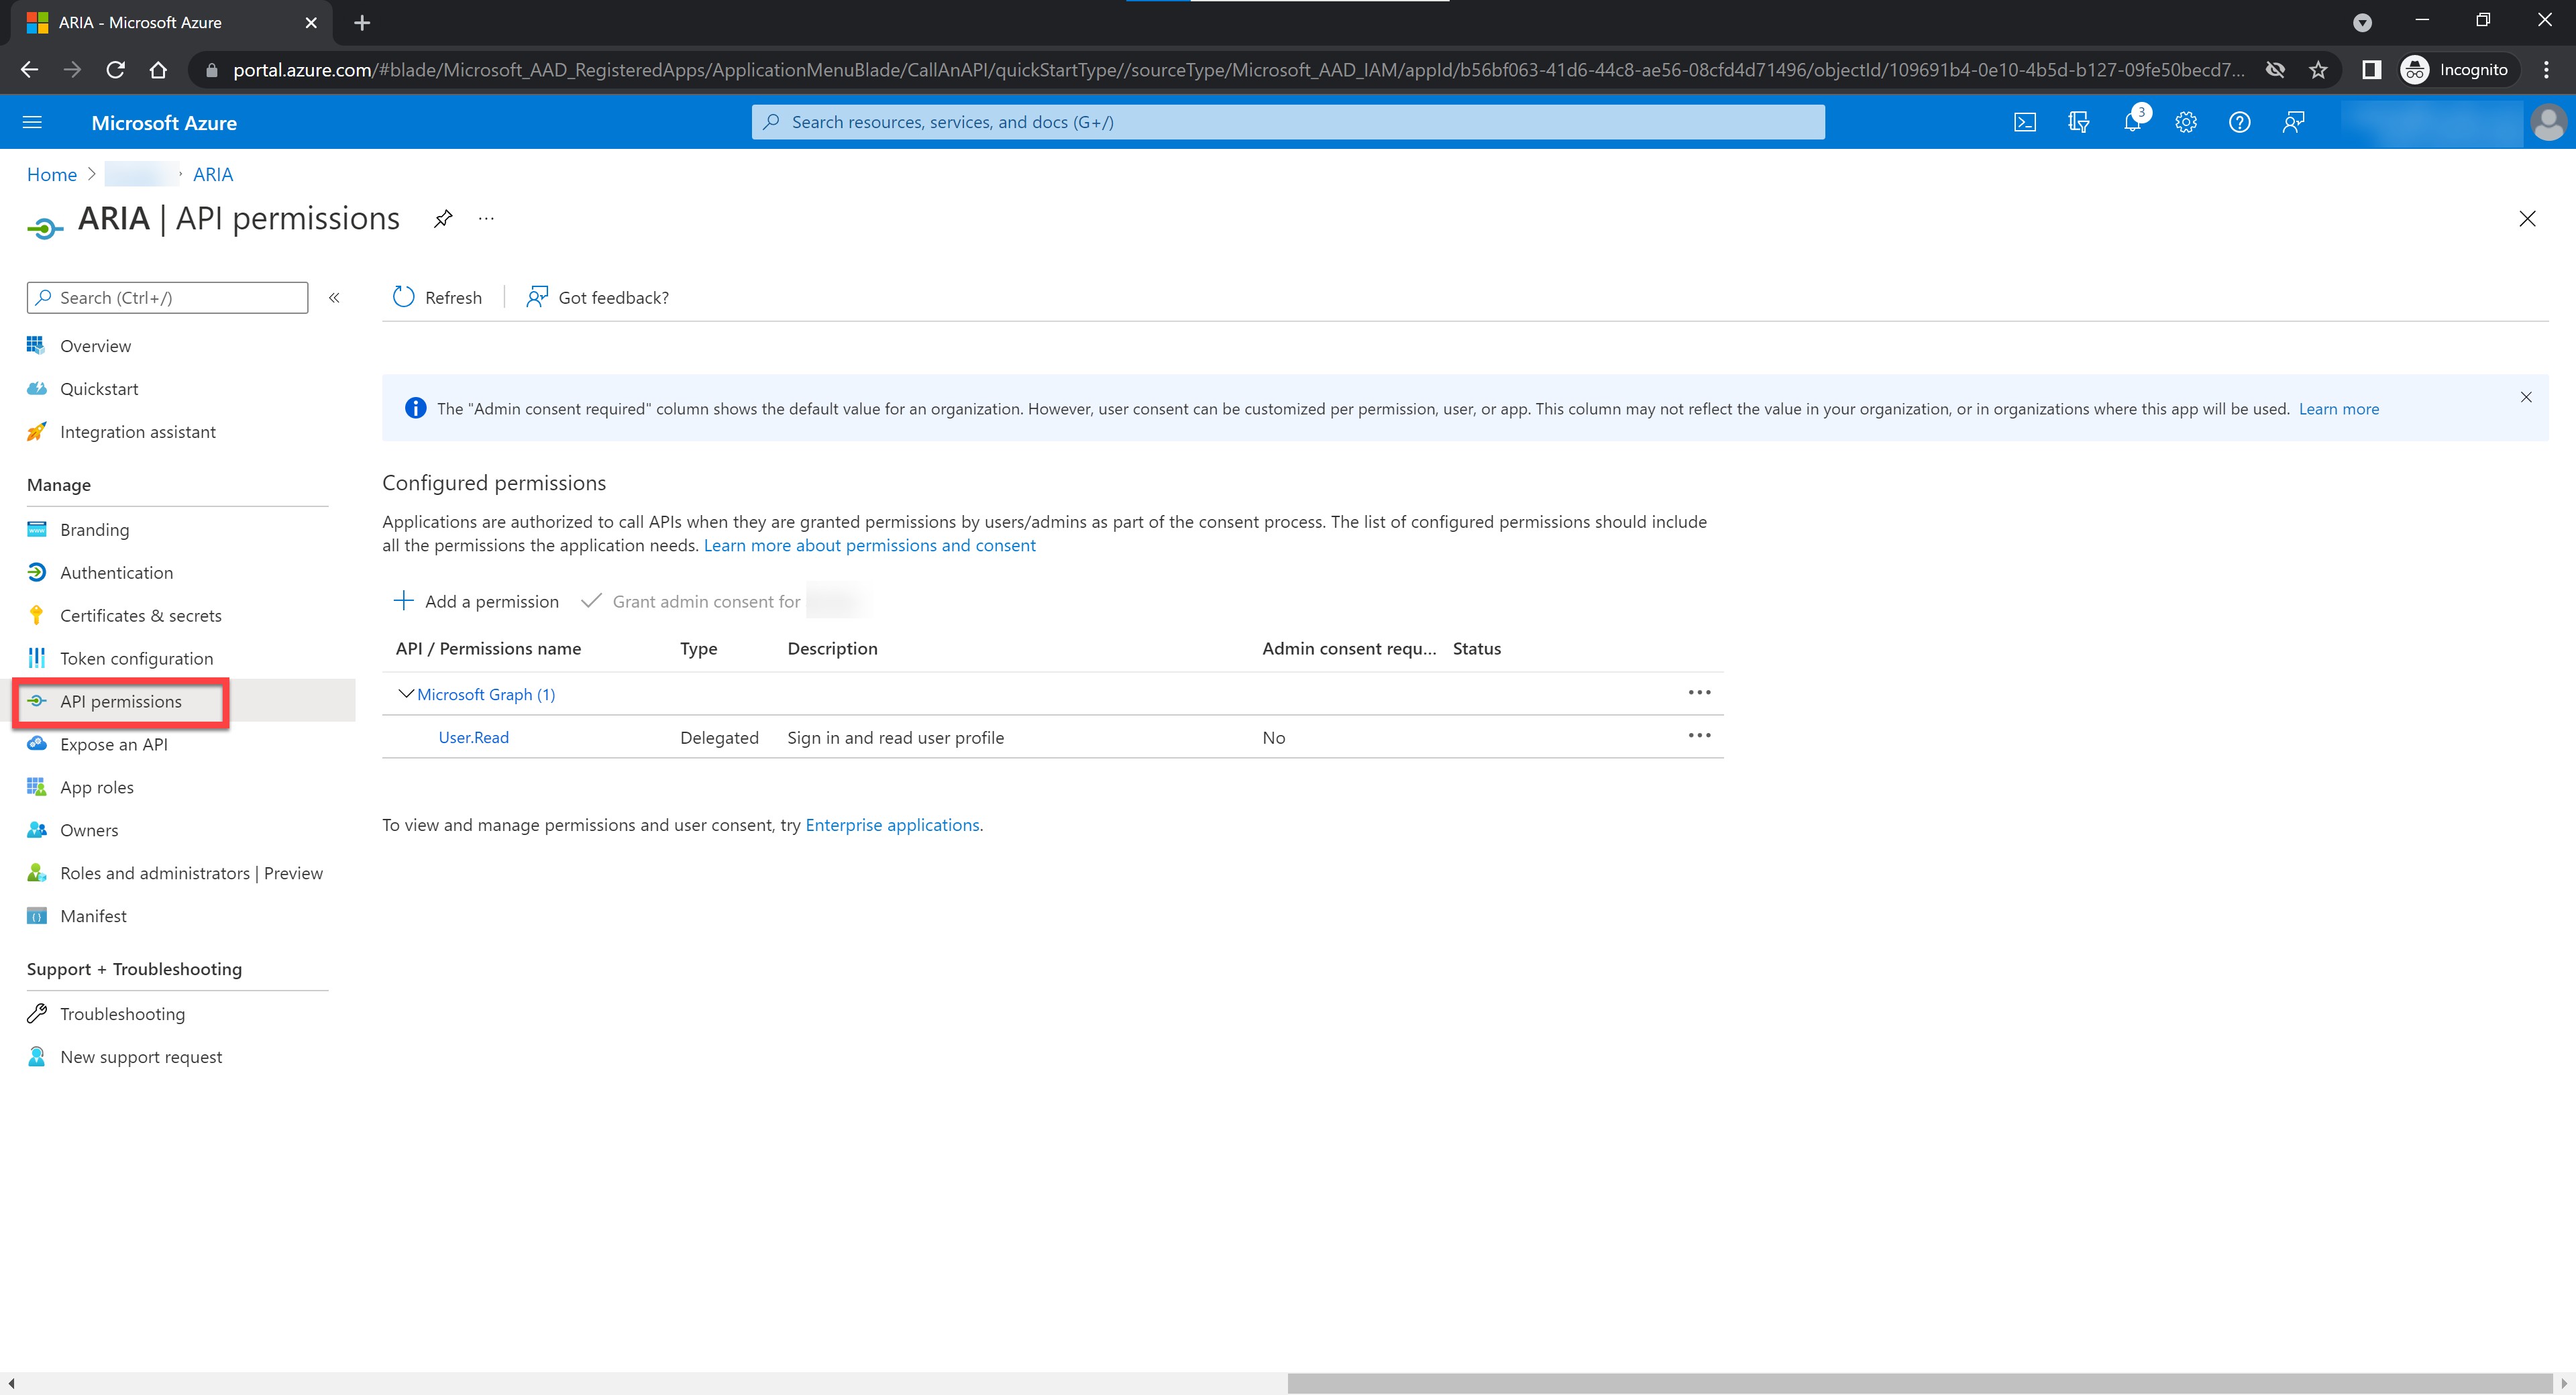
Figure 14: Select API Permissions
15. Click Add a permission.

Figure 15: Add a Permission
16. Click Microsoft Graph.
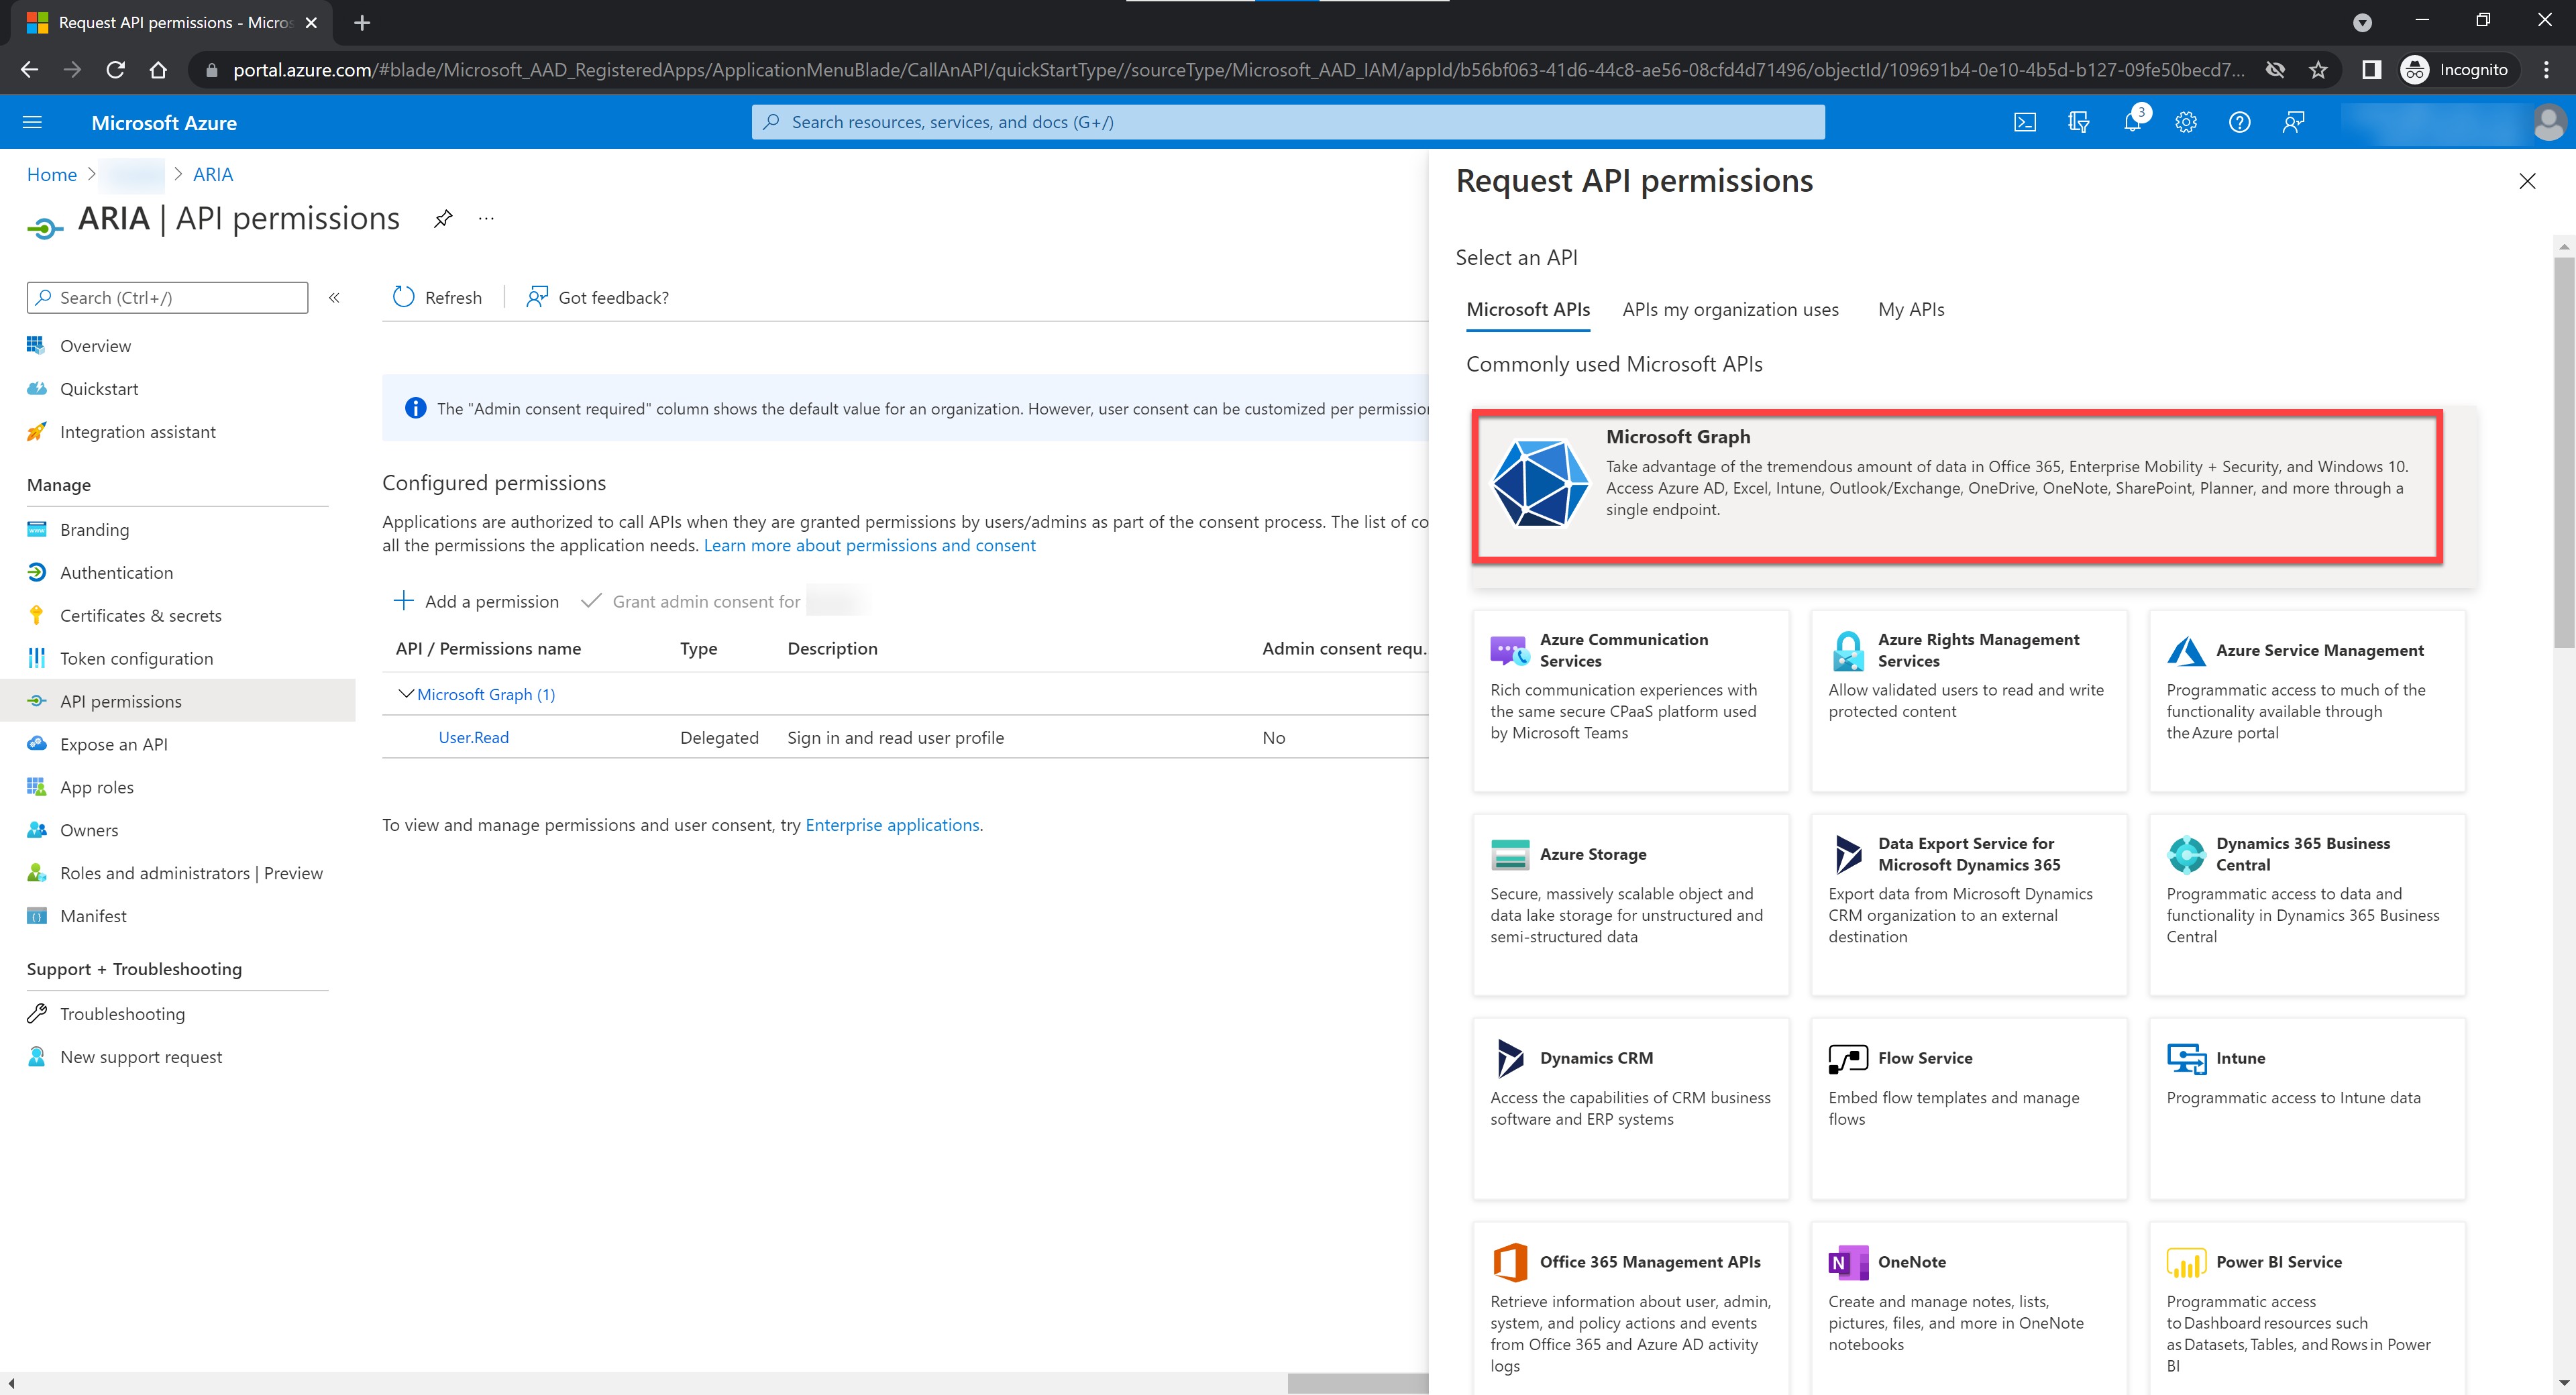
Figure 16: Click Microsoft Graph
17. Click Application permissions.

Figure 17: Click Application Permissions
18. Search on the keyword Audit, select AuditLog.Read.All, and click Add permissions.
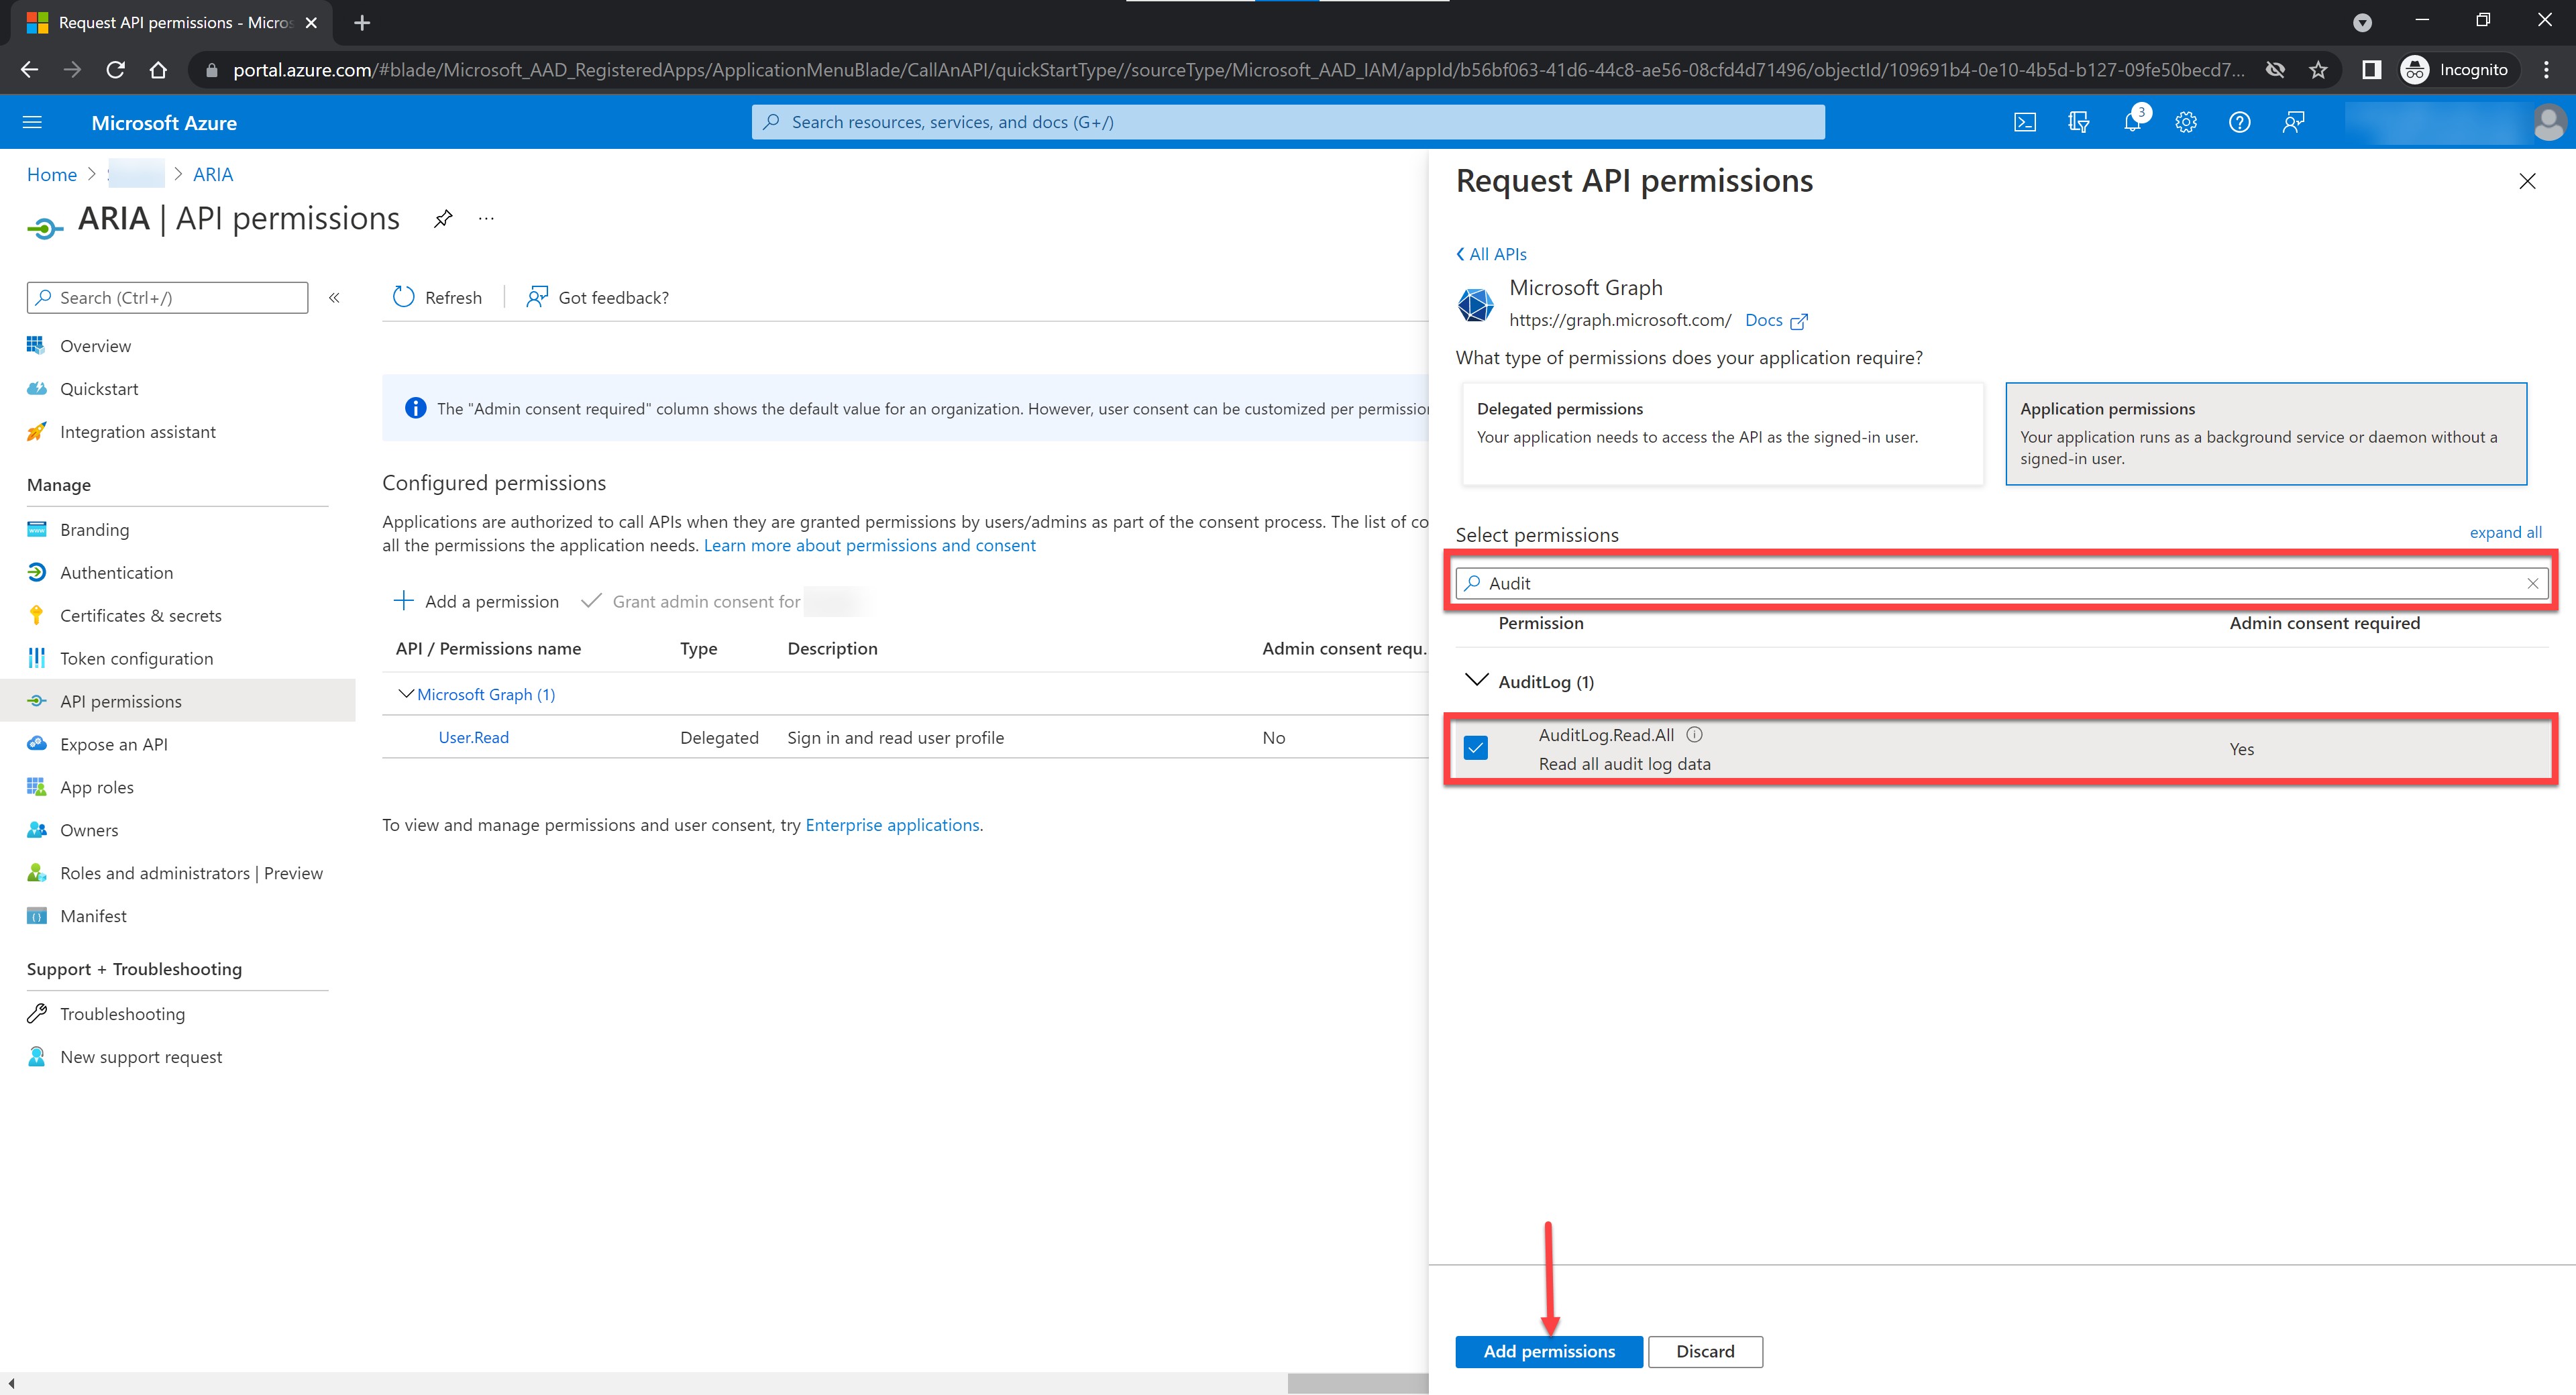
Figure 18: Add Audit Permissions
19. Repeat steps 15 through 17, then search on the keyword User.Read.All, select User.Read.All, and click
Add permissions.
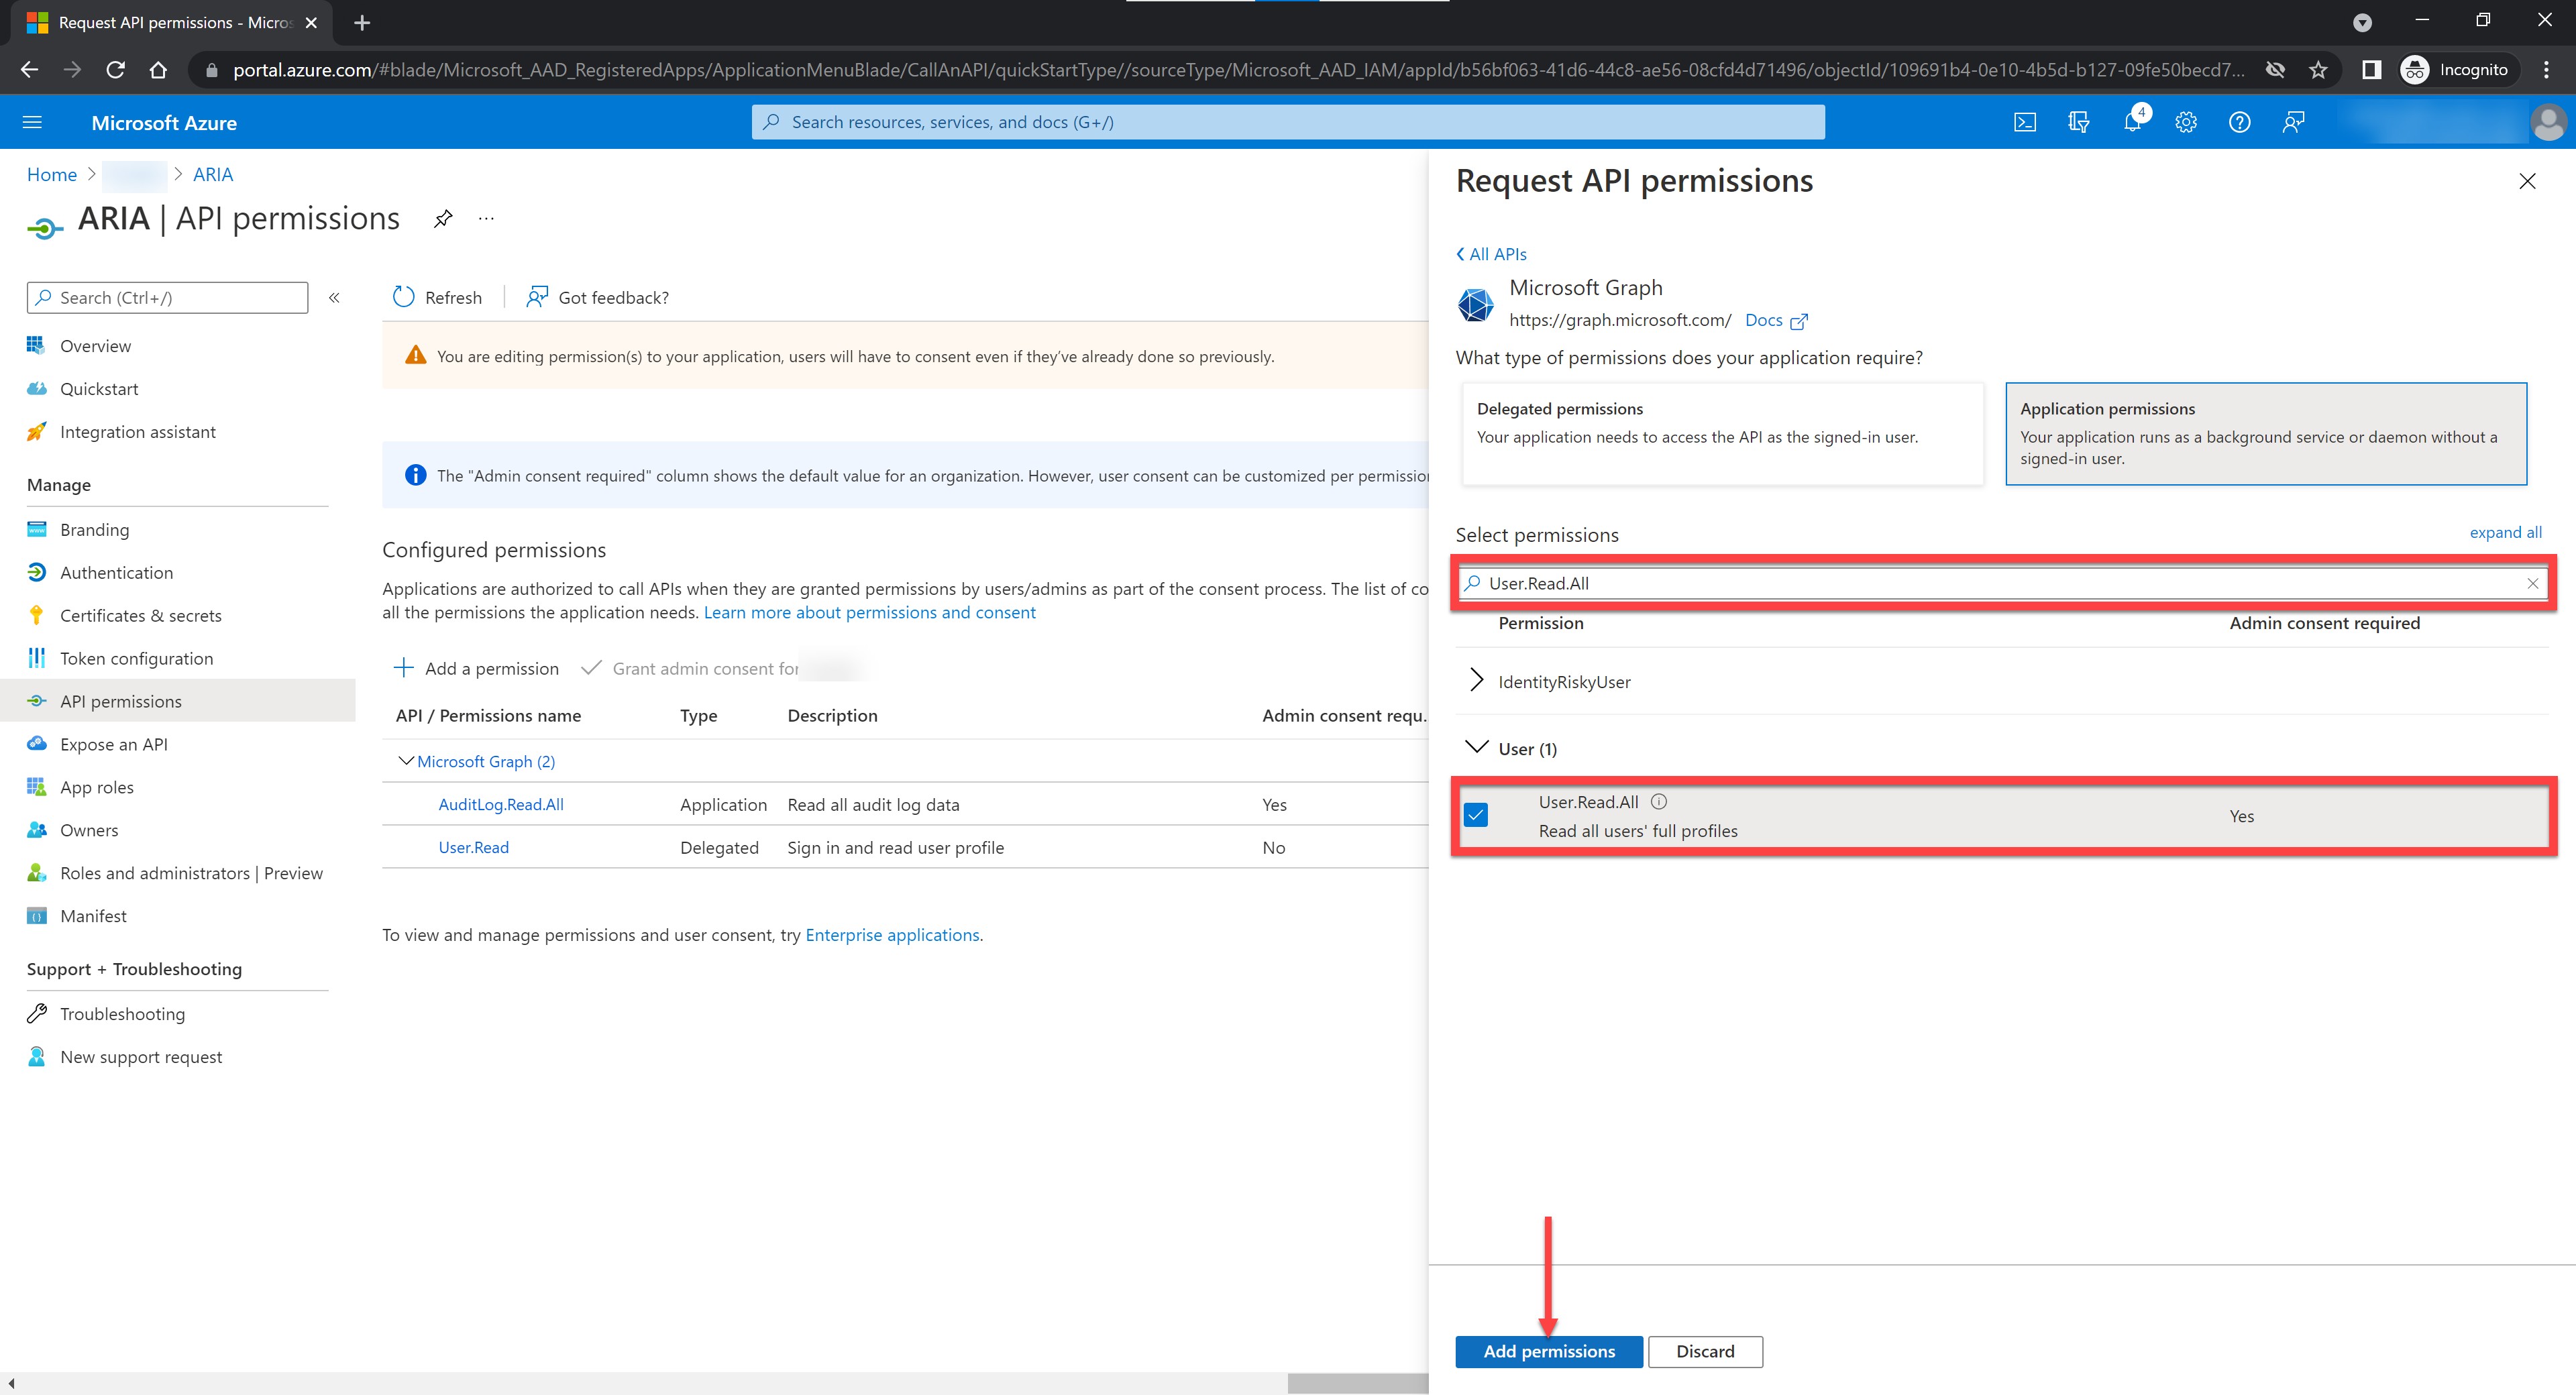
Figure 19: Add Read Permissions
20. Repeat steps 15 through 17, then search on the keyword SecurityEvents, select SecurityEvents.Read, and click Add permissions.
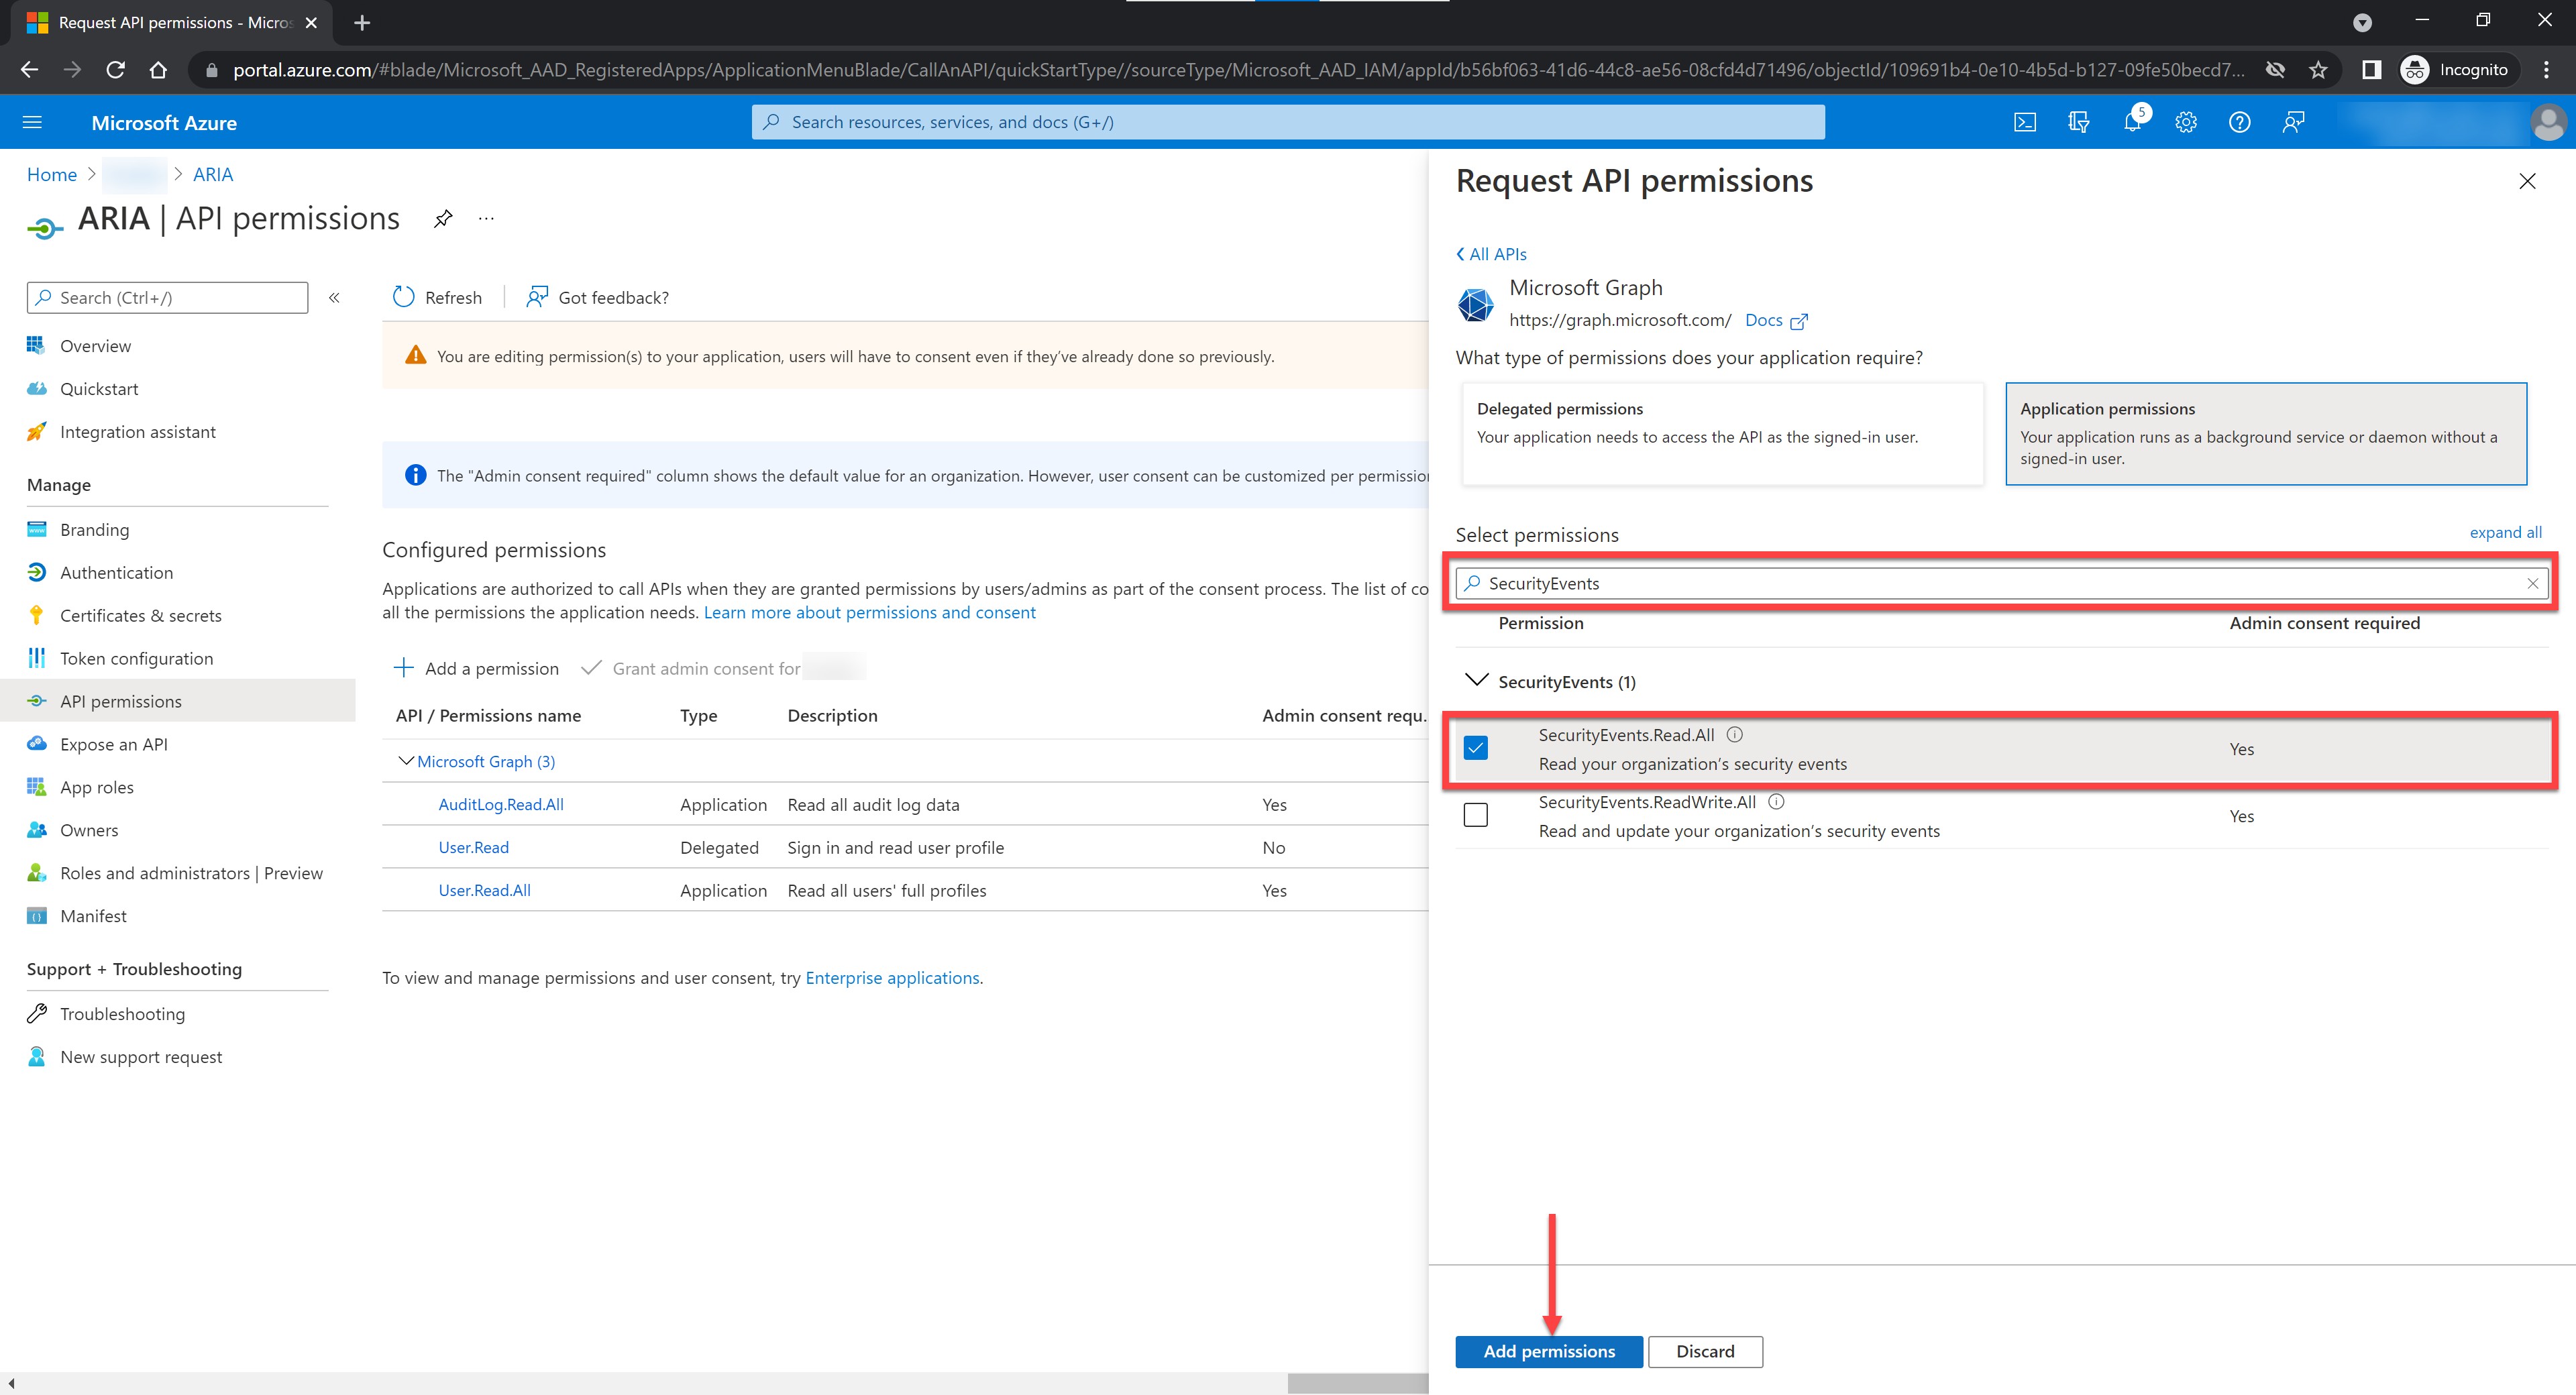
Figure 20: Add Security Event Permissions
21. Repeat steps 15 through 17, then search on the keyword Mail.Read.Basic, select Mail.Read.Basic.All, and click Add permissions.
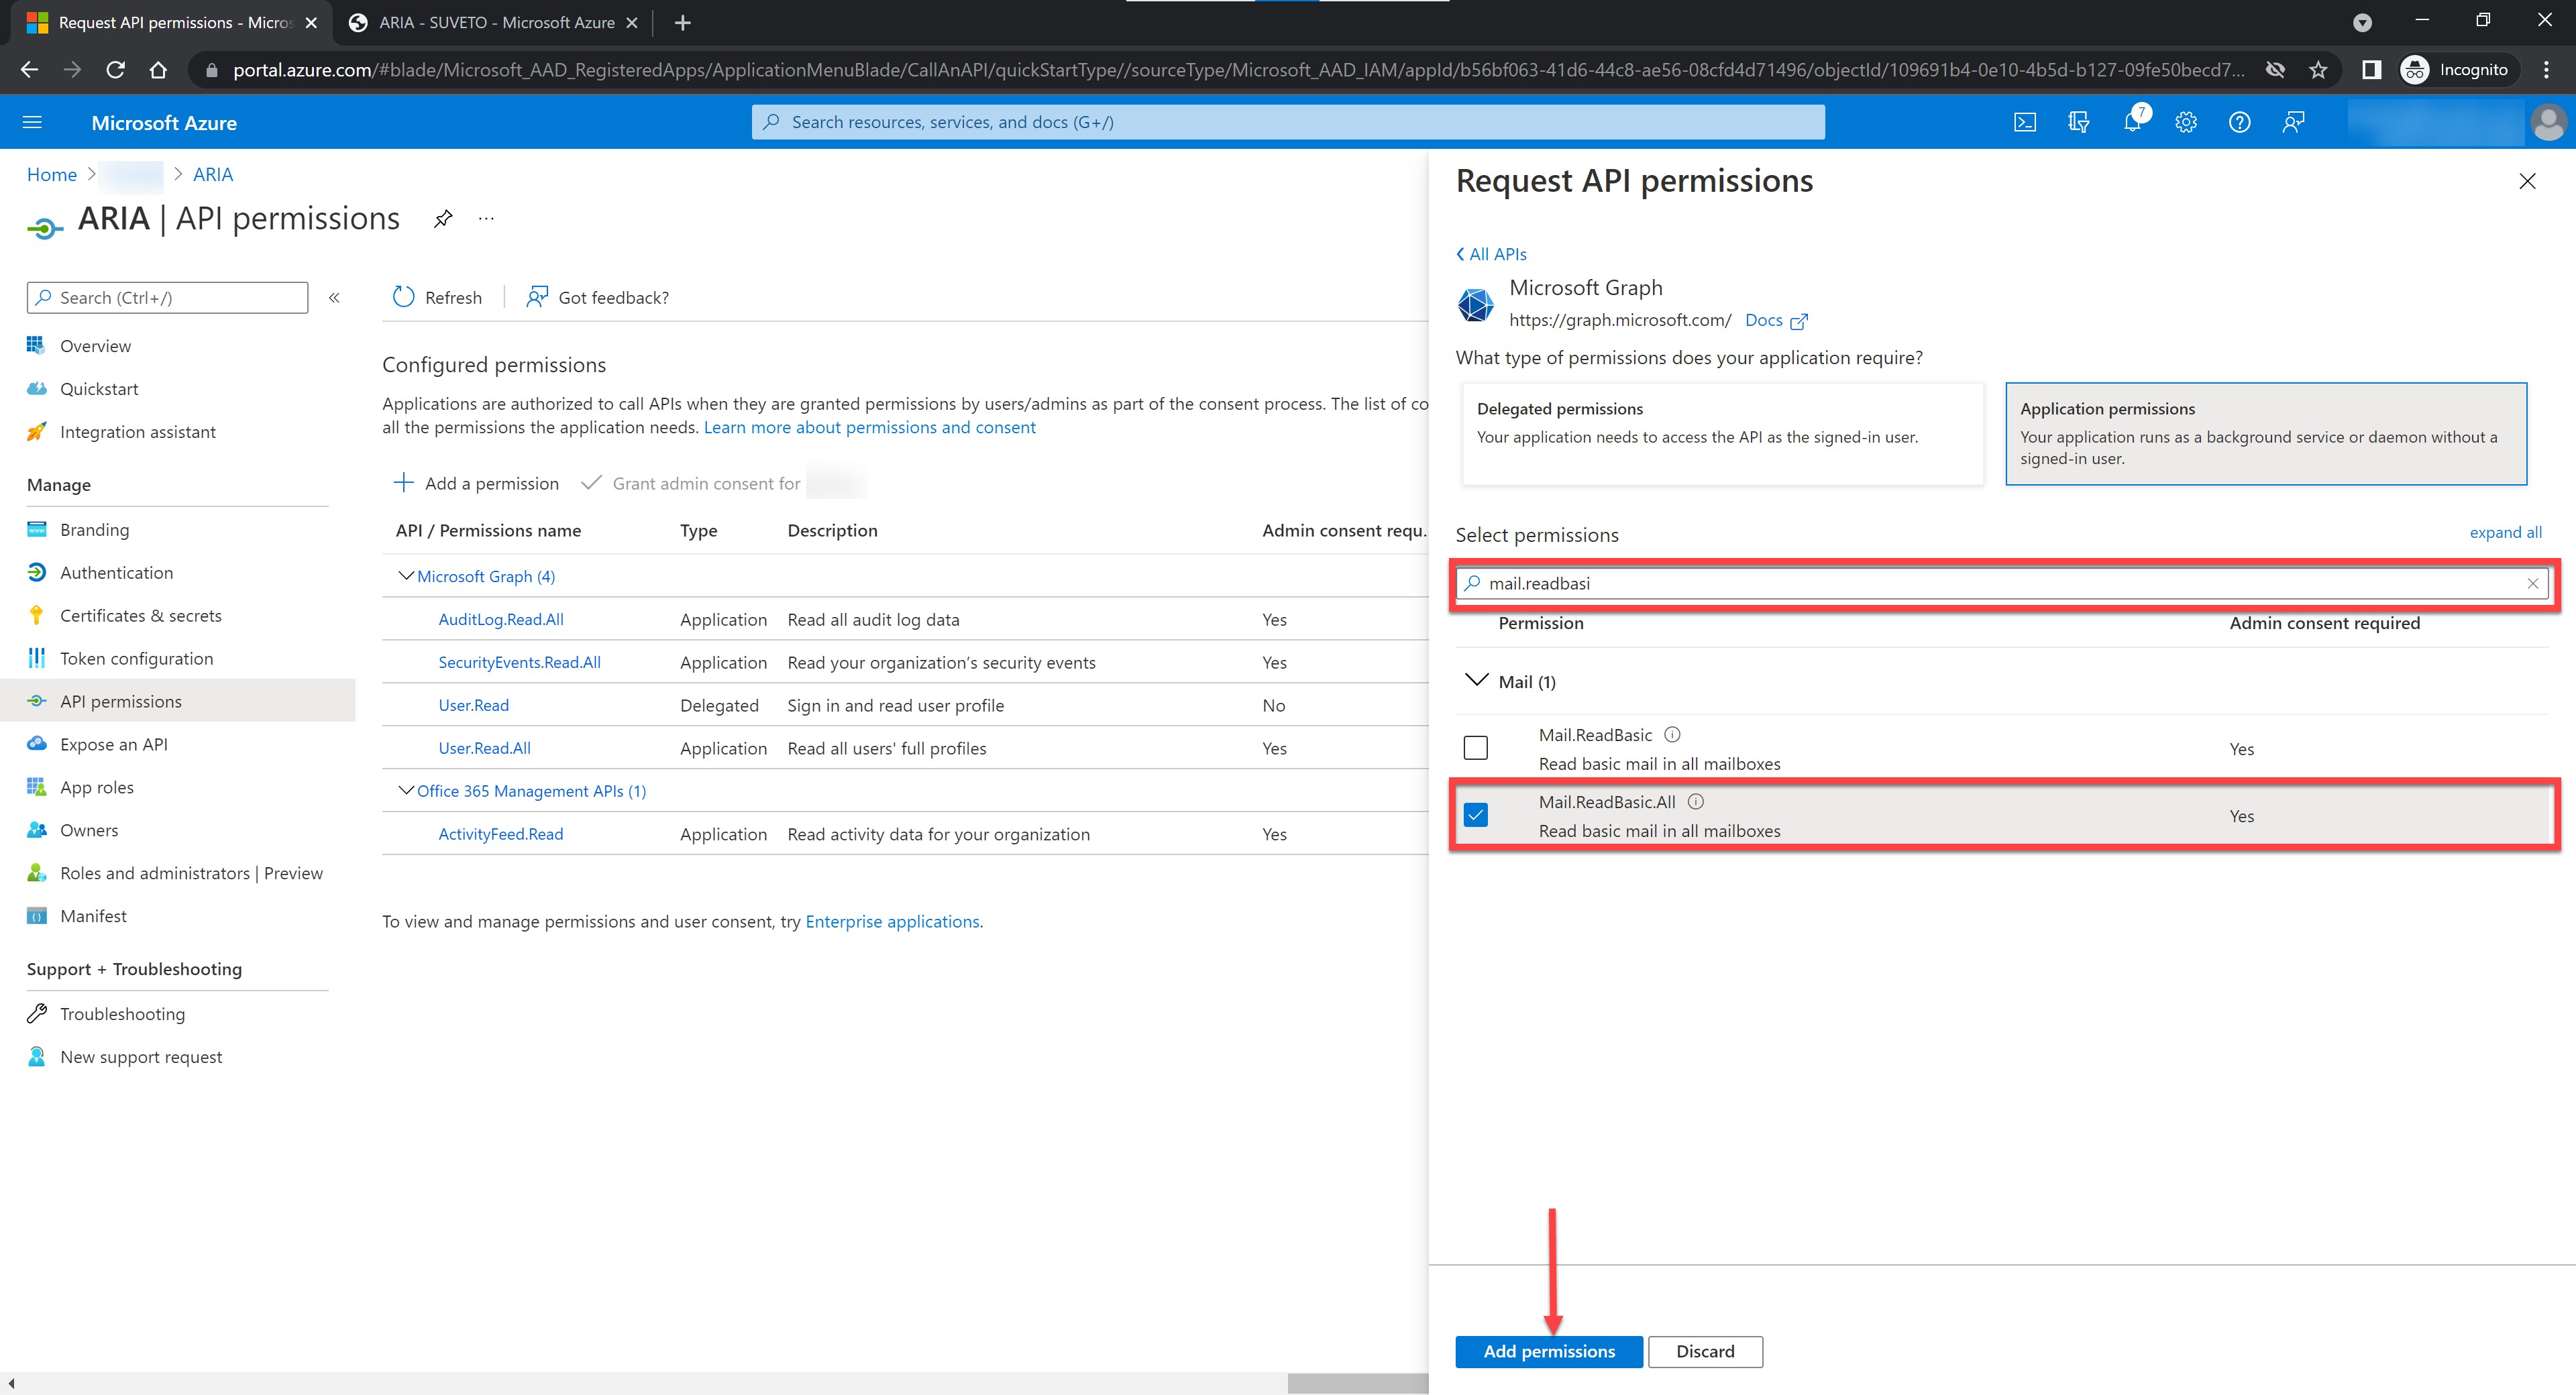
Figure 21: Add Mail Permissions
22. Repeat step 15 and click Office 365 Management APIs.
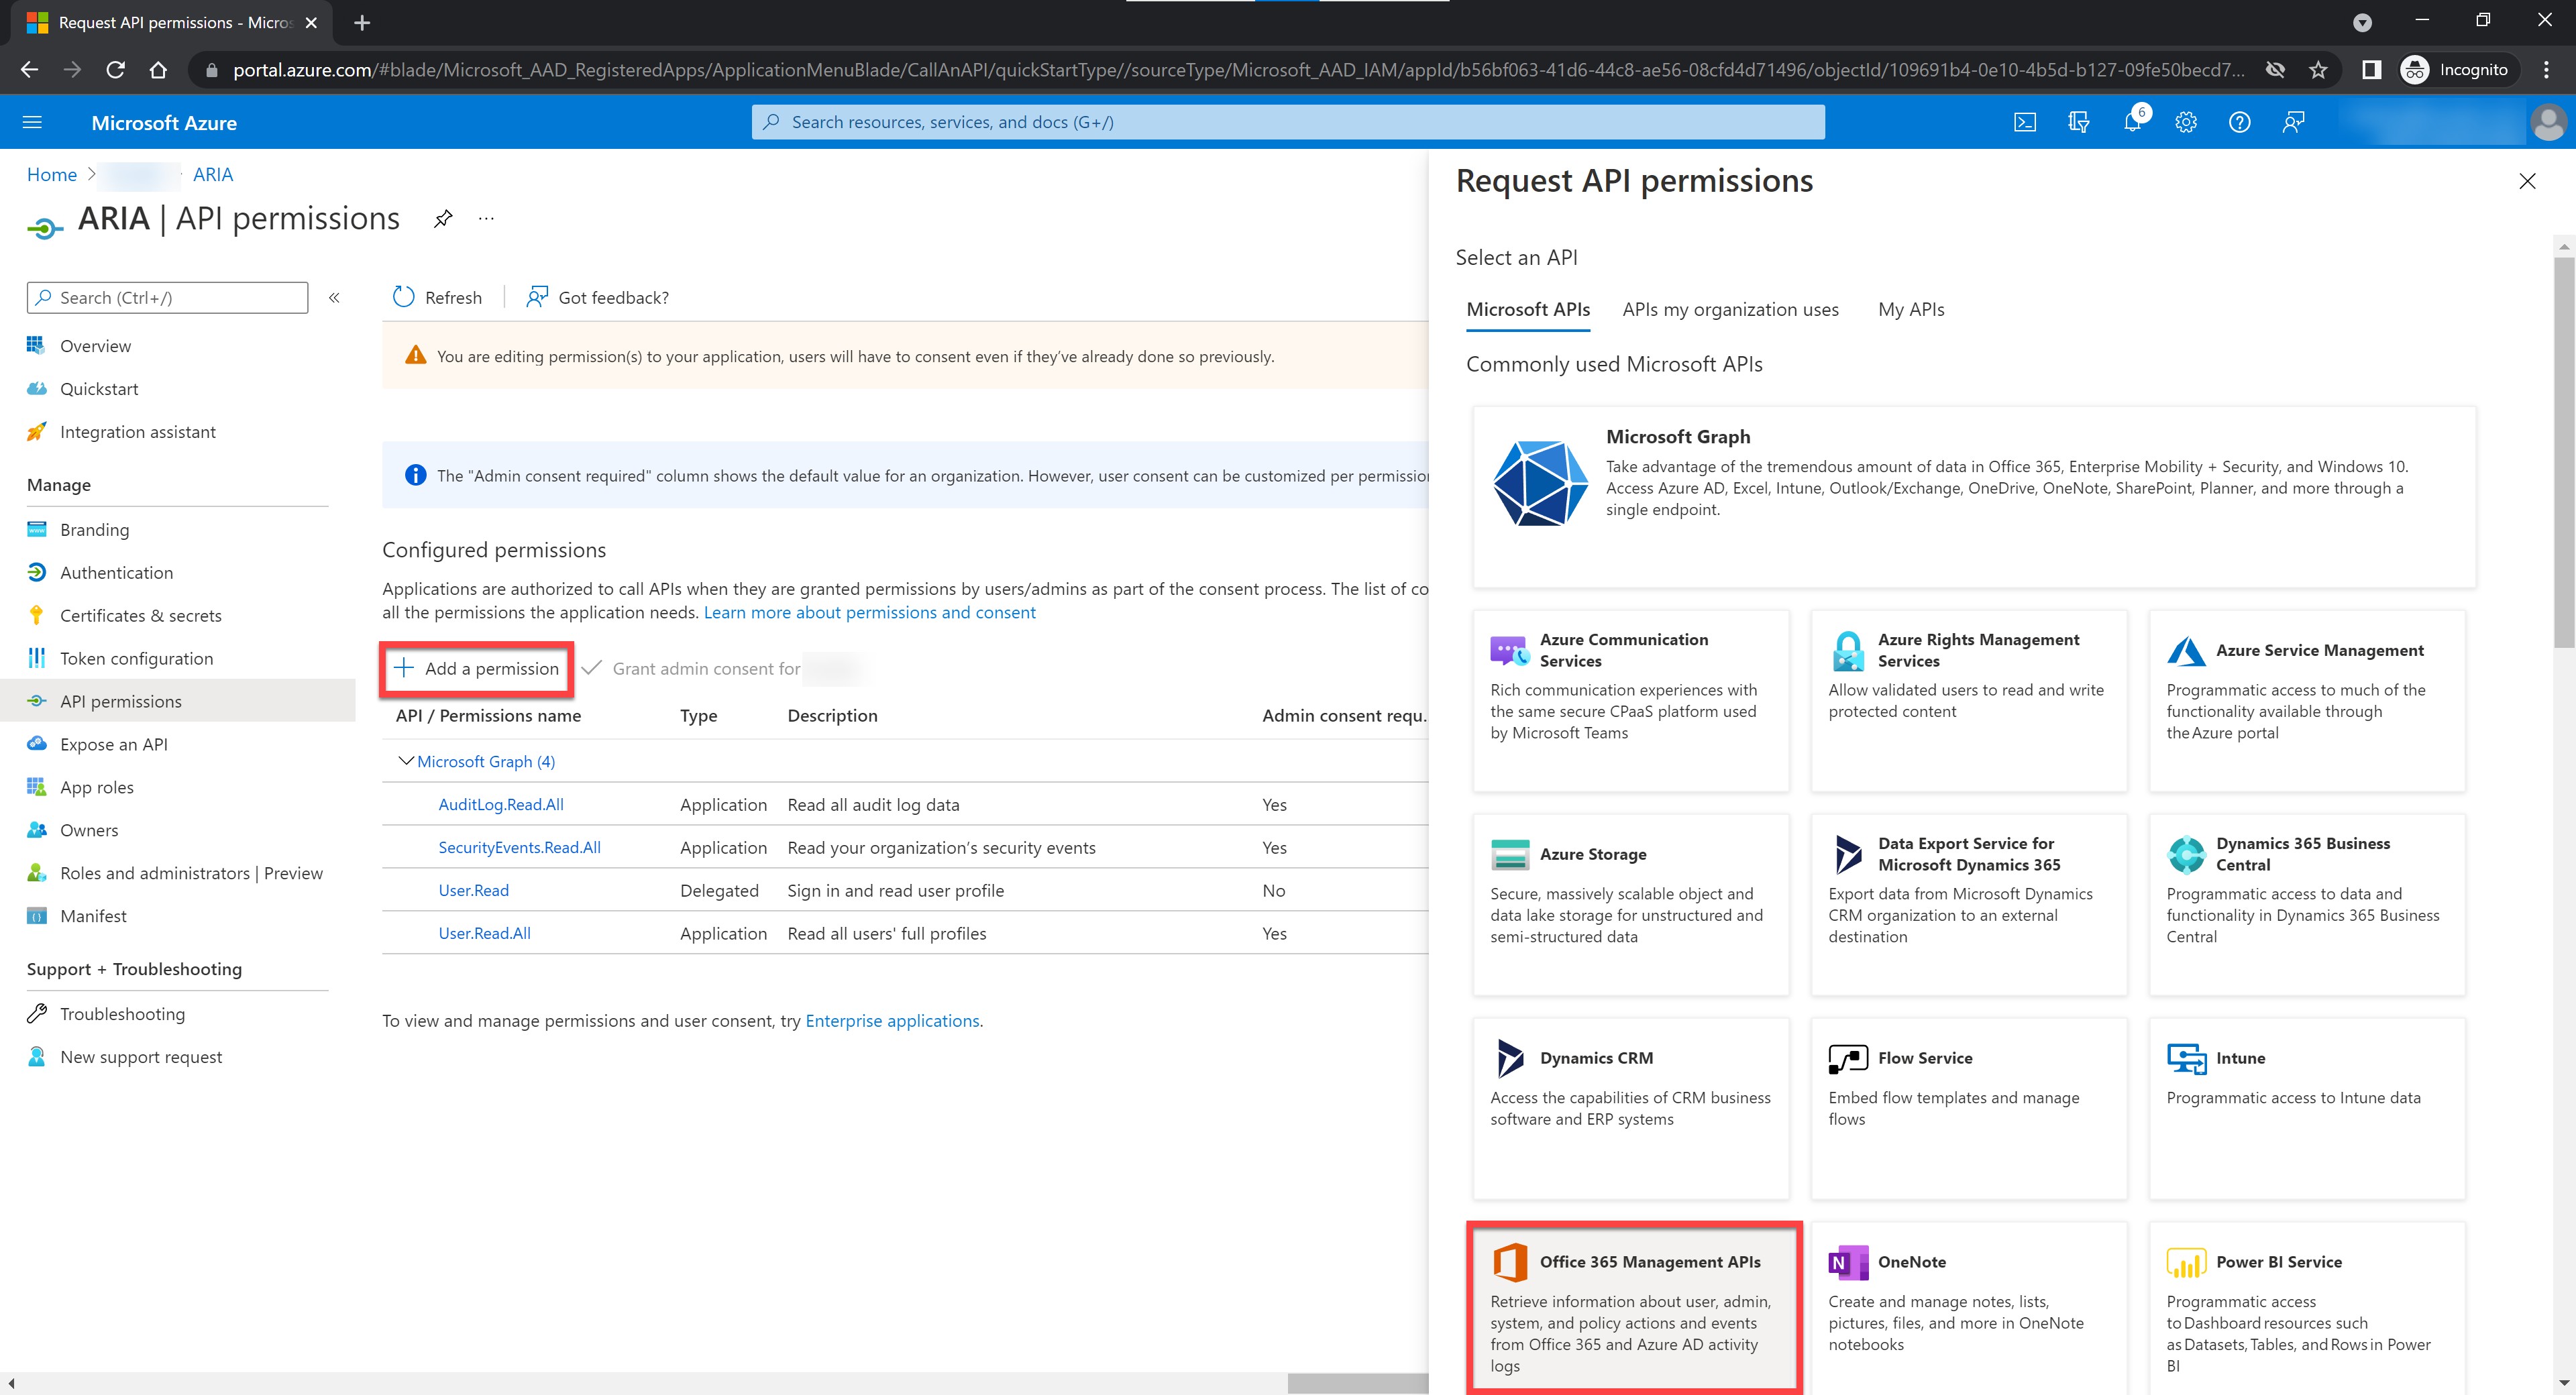
Figure 22: Click Office 365 Management APIs
23. Click Application permissions.
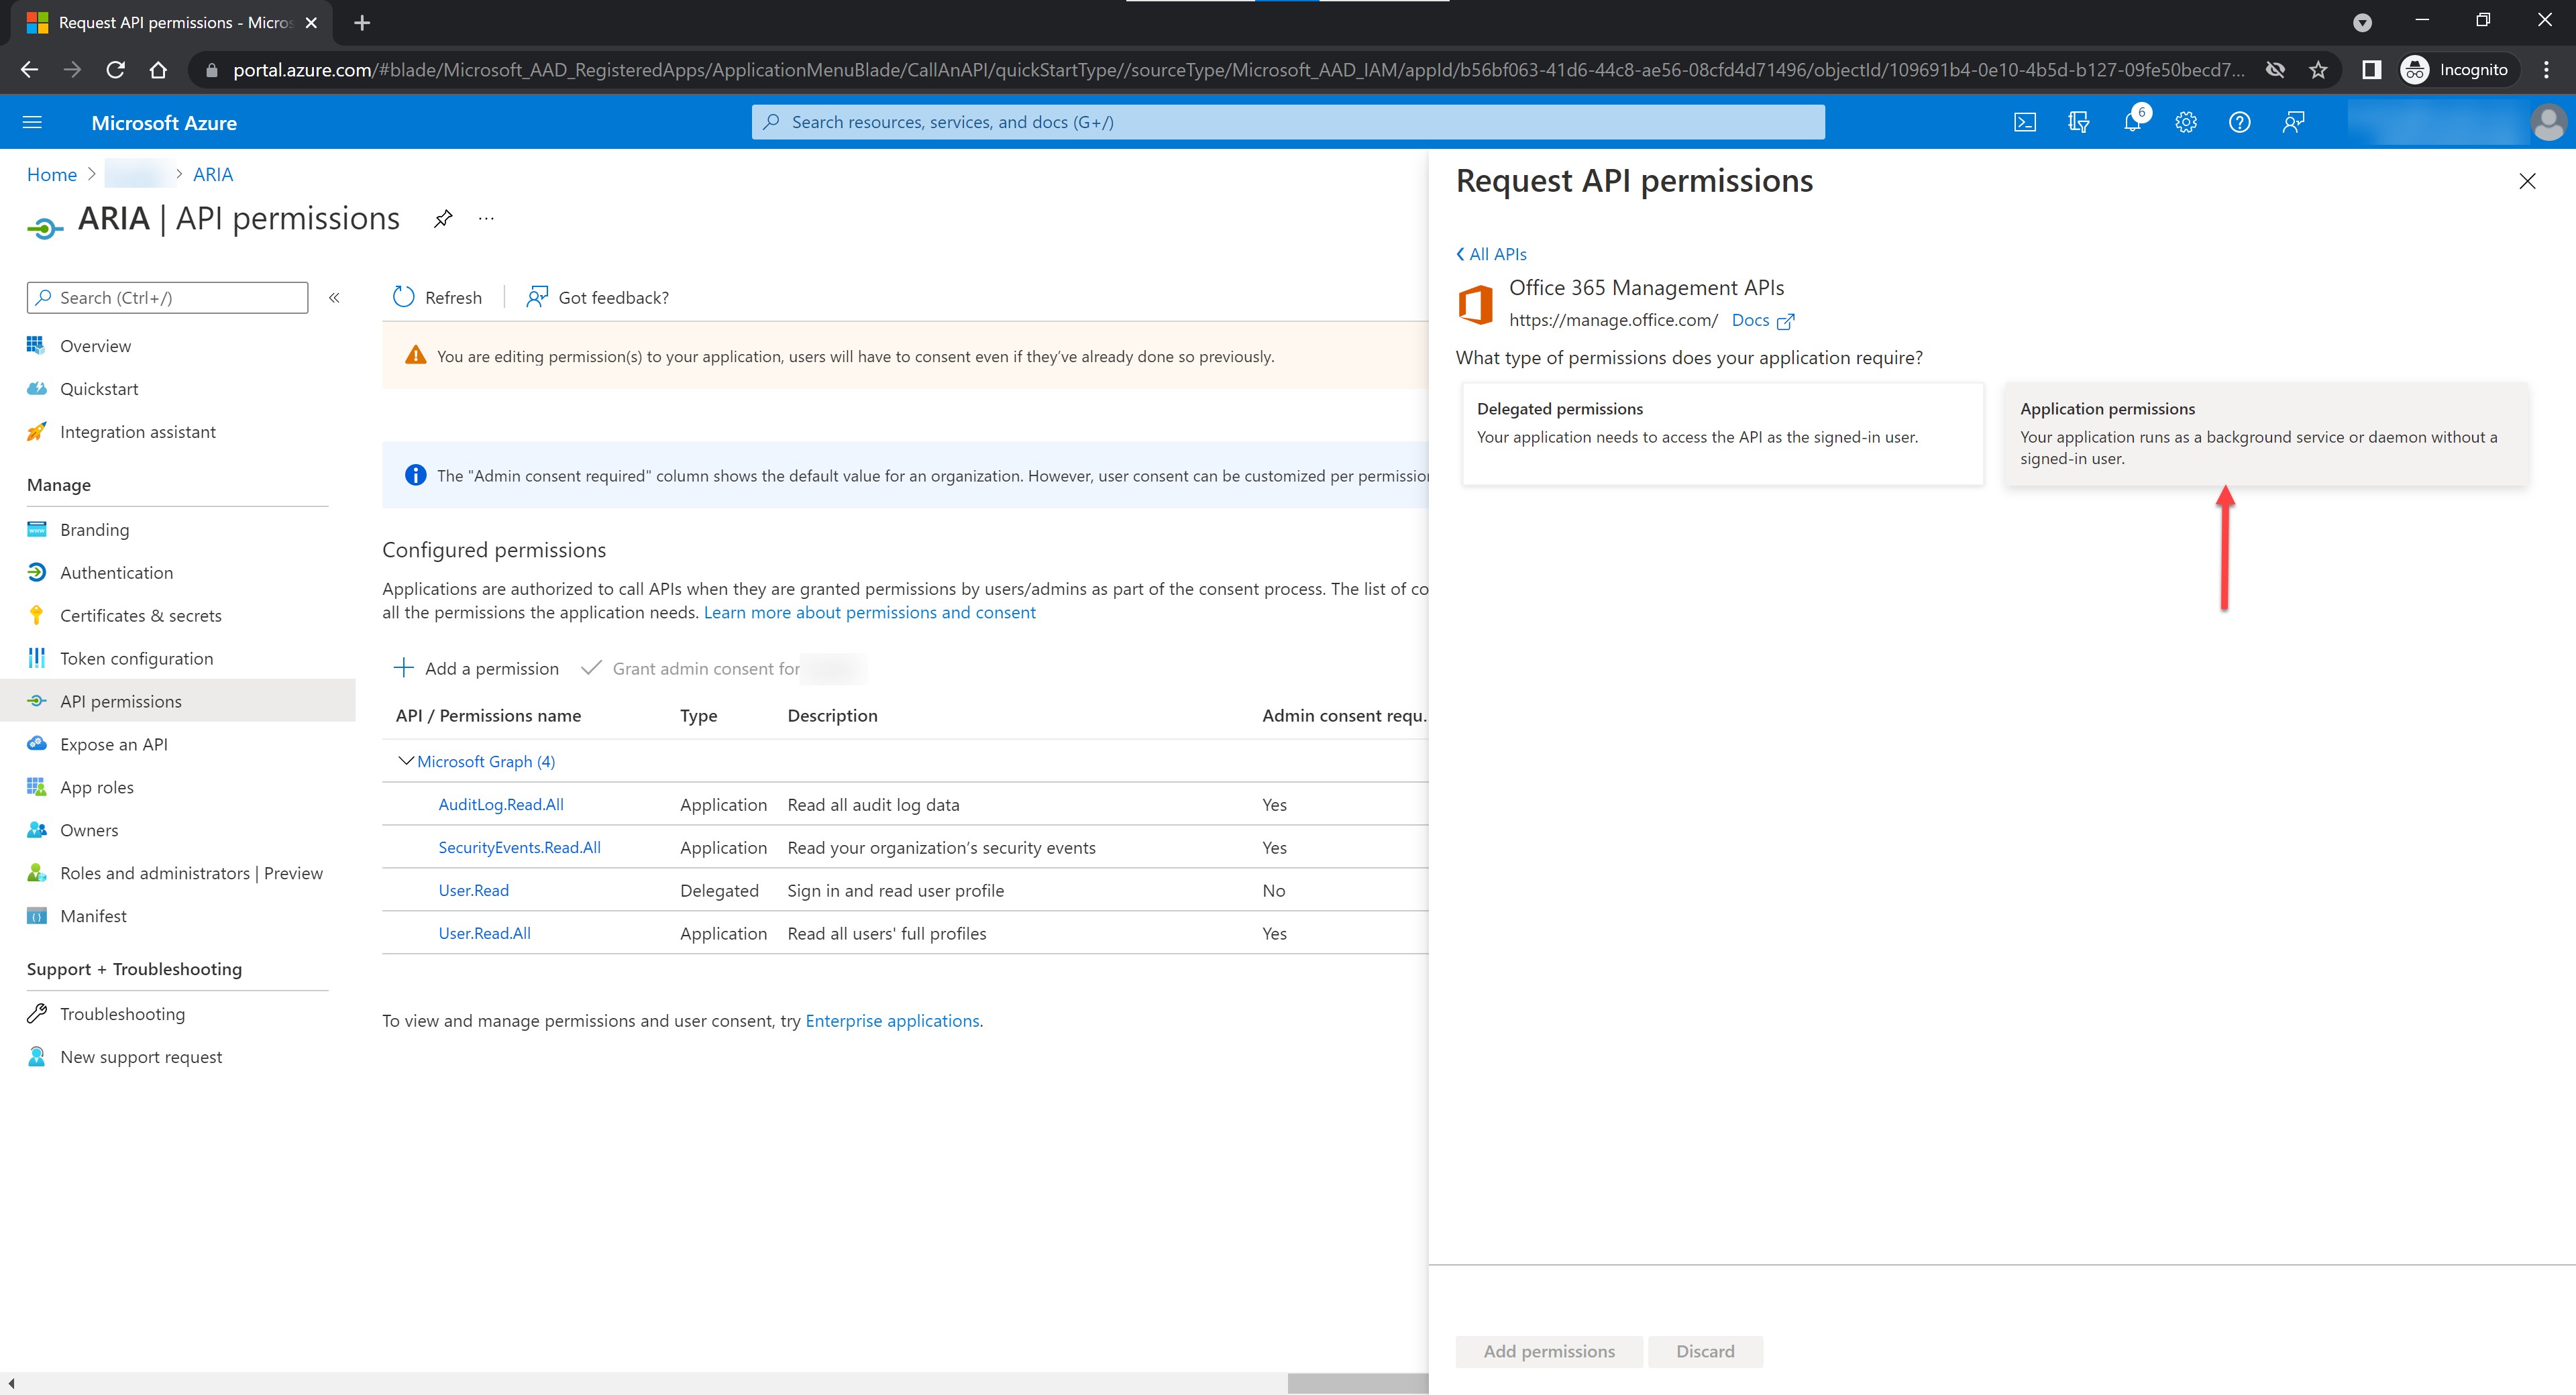
Figure 23: Click Application Permissions for Office 365
24. Select ActivityFeed.Read and click Add permissions.

Figure 24: Add Activity Feed Permissions
25. Click Grant admin consent.

Figure 25: Click Grant Admin Consent
26. Confirm the status of all permissions contains a checkmark (![]() ), indicating the permissions are granted.
), indicating the permissions are granted.

Figure 26: Permissions Granted
2 Requirements
Before you configure the CCE to collect the Microsoft logs, make sure you have the following information:
l Tenant Domain (Primary Domain) from Step 3 or Step 5
NOTE: If the values are different, use the domain with onmicrosoft.com as part of the name.
l Client ID (Application ID) from Step 8
l Tenant ID (Directory ID) from Step 8
l Client Secret Value from Step 13
In addition, your firewall must allow the following URLs:
3 CCE
To configure the CCE:
1. Log in and access the tenant that will collect the Microsoft logs.
2. Select Provisioning > Cloud Devices > Azure Configuration.
3. Click Add.
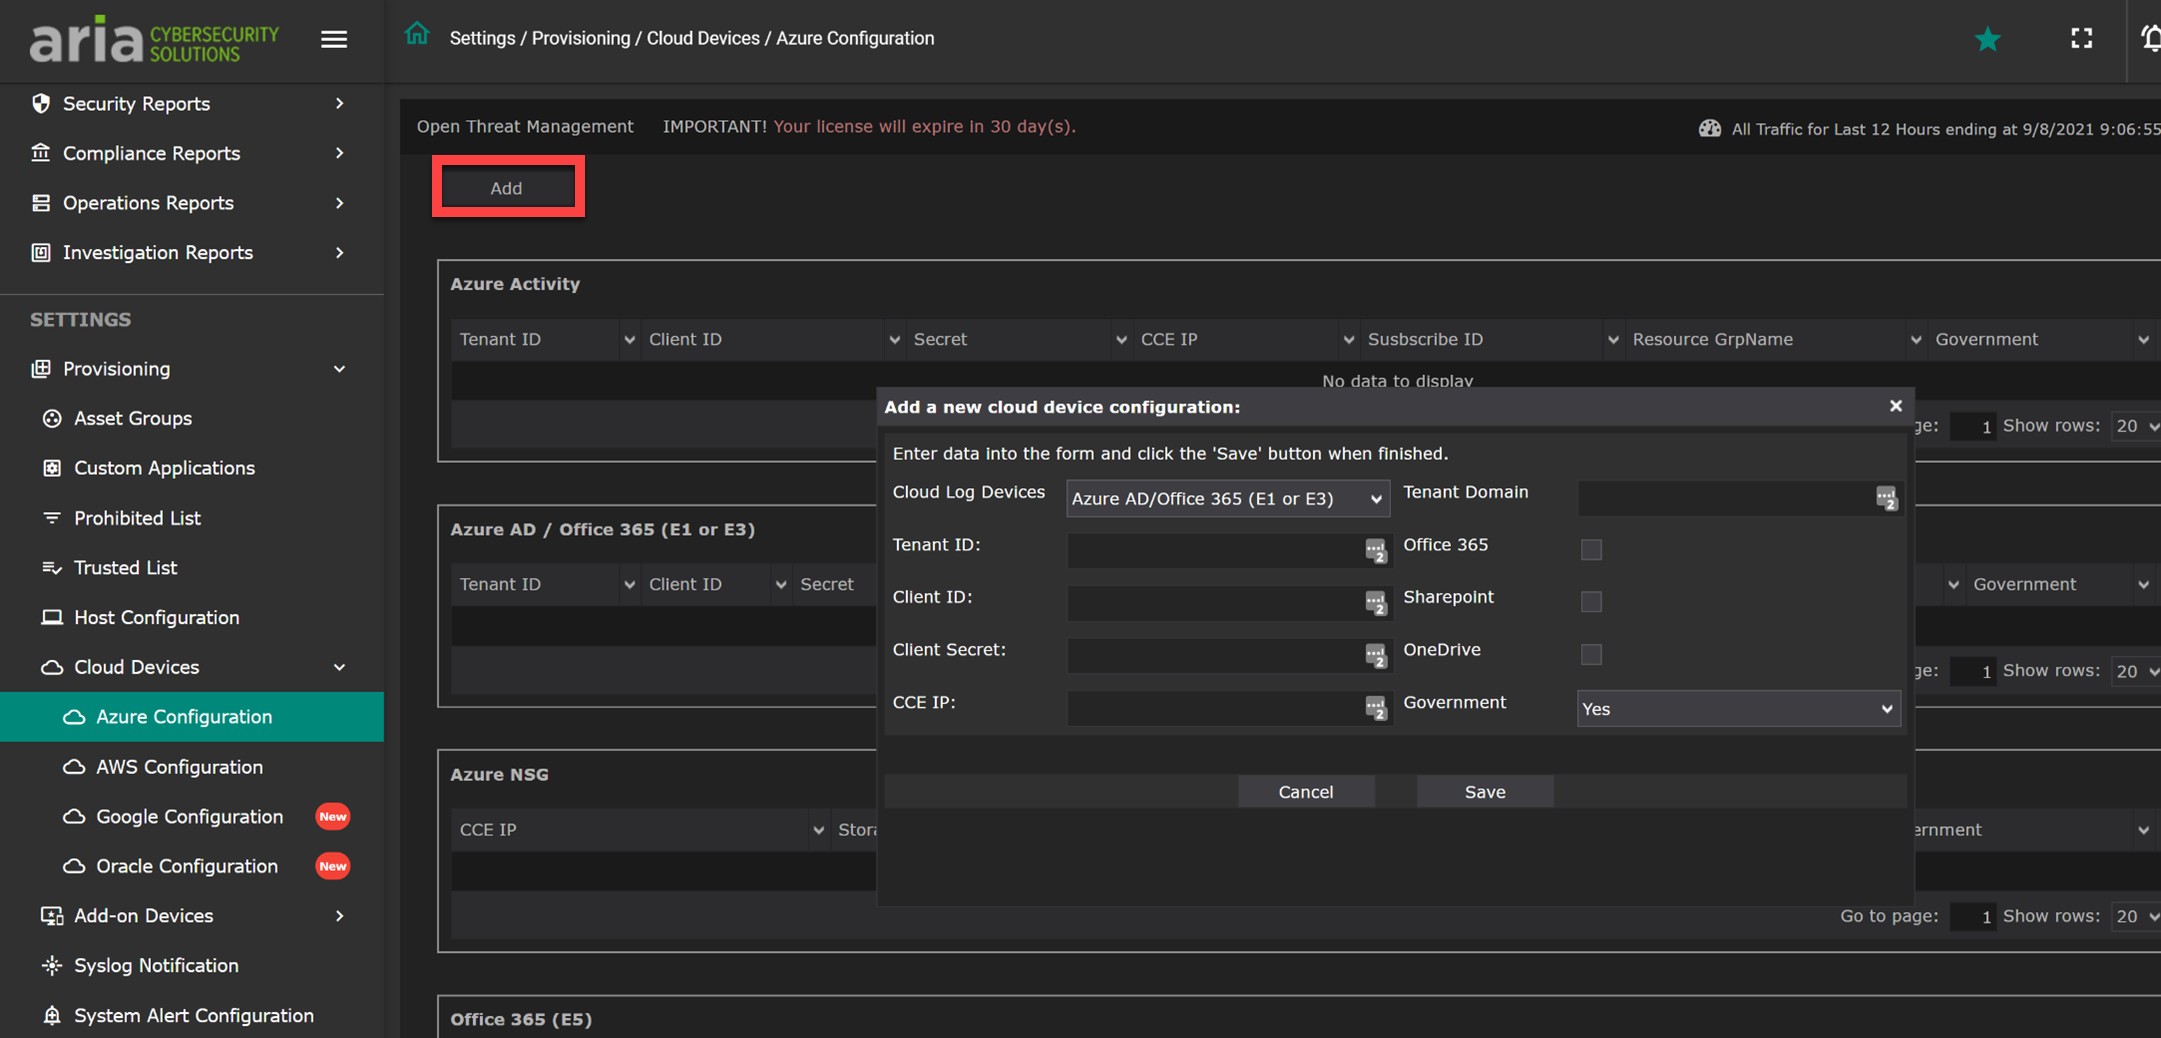
Figure 27: Add Cloud Configuration
4. Use the drop-down box to select Azure AD / Office 365 (E1 or E3).
5. Provide the information copied from Azure, enter the CCE IP address, and check all three boxes, as shown below.

Figure 28: Configure Cloud Service
6. Click Save.
Was this article helpful?
That’s Great!
Thank you for your feedback
Sorry! We couldn't be helpful
Thank you for your feedback
Feedback sent
We appreciate your effort and will try to fix the article